

So as I was munching on my bowl of ‘Oops, All Berries,’ I realized I have attended over 120 art festivals over the past 15 years. During that time, I recognized the depths of what all I got into, met countless awesome people willing to share helpful experiences, and learned more than I ever thought I could. Now I feel confident that it’s time to update the original blog post about this topic from my first year in 2008.
This will not be a perfect guide, but it’s a summary of what I’ve learned. Hope it’s helpful.
Sections:
Introduction
Art
Booth
The Show
I. Introduction
Where do you start?
Browse your nearest show and observe. Get a feel for the event.
What do you see first? What kind of art is here? How are the artists showing their work? How is the crowd, the energy? How are you feeling being here?
Get to know an artist or two and ask them how the show is going for them.
Are there other activities at the event? If there’s live music, is the sound manageable enough to have a conversation with an artist in their booth? If it’s windy, how are the booths handling the weather? If it’s getting dark out, is the art staying lit? How are the customers doing? Are they enjoying the event? Are they buying?
Visit another art festival. Notice the similarities and differences. Is it bigger, smaller? What is the variety of artists? What is the caliber and skill of the artists? If the weather is different, how is the show handling it?

What are you getting yourself into?
An art festival is a lot of things:

It’s a venue where artists gather and collectively seek to make the community’s life better by offering handmade artwork.
It’s a venue where artists gather and collectively seek to make money by building a mobile art gallery after staying up countless nights and early mornings creating their best work and driving all over the country!
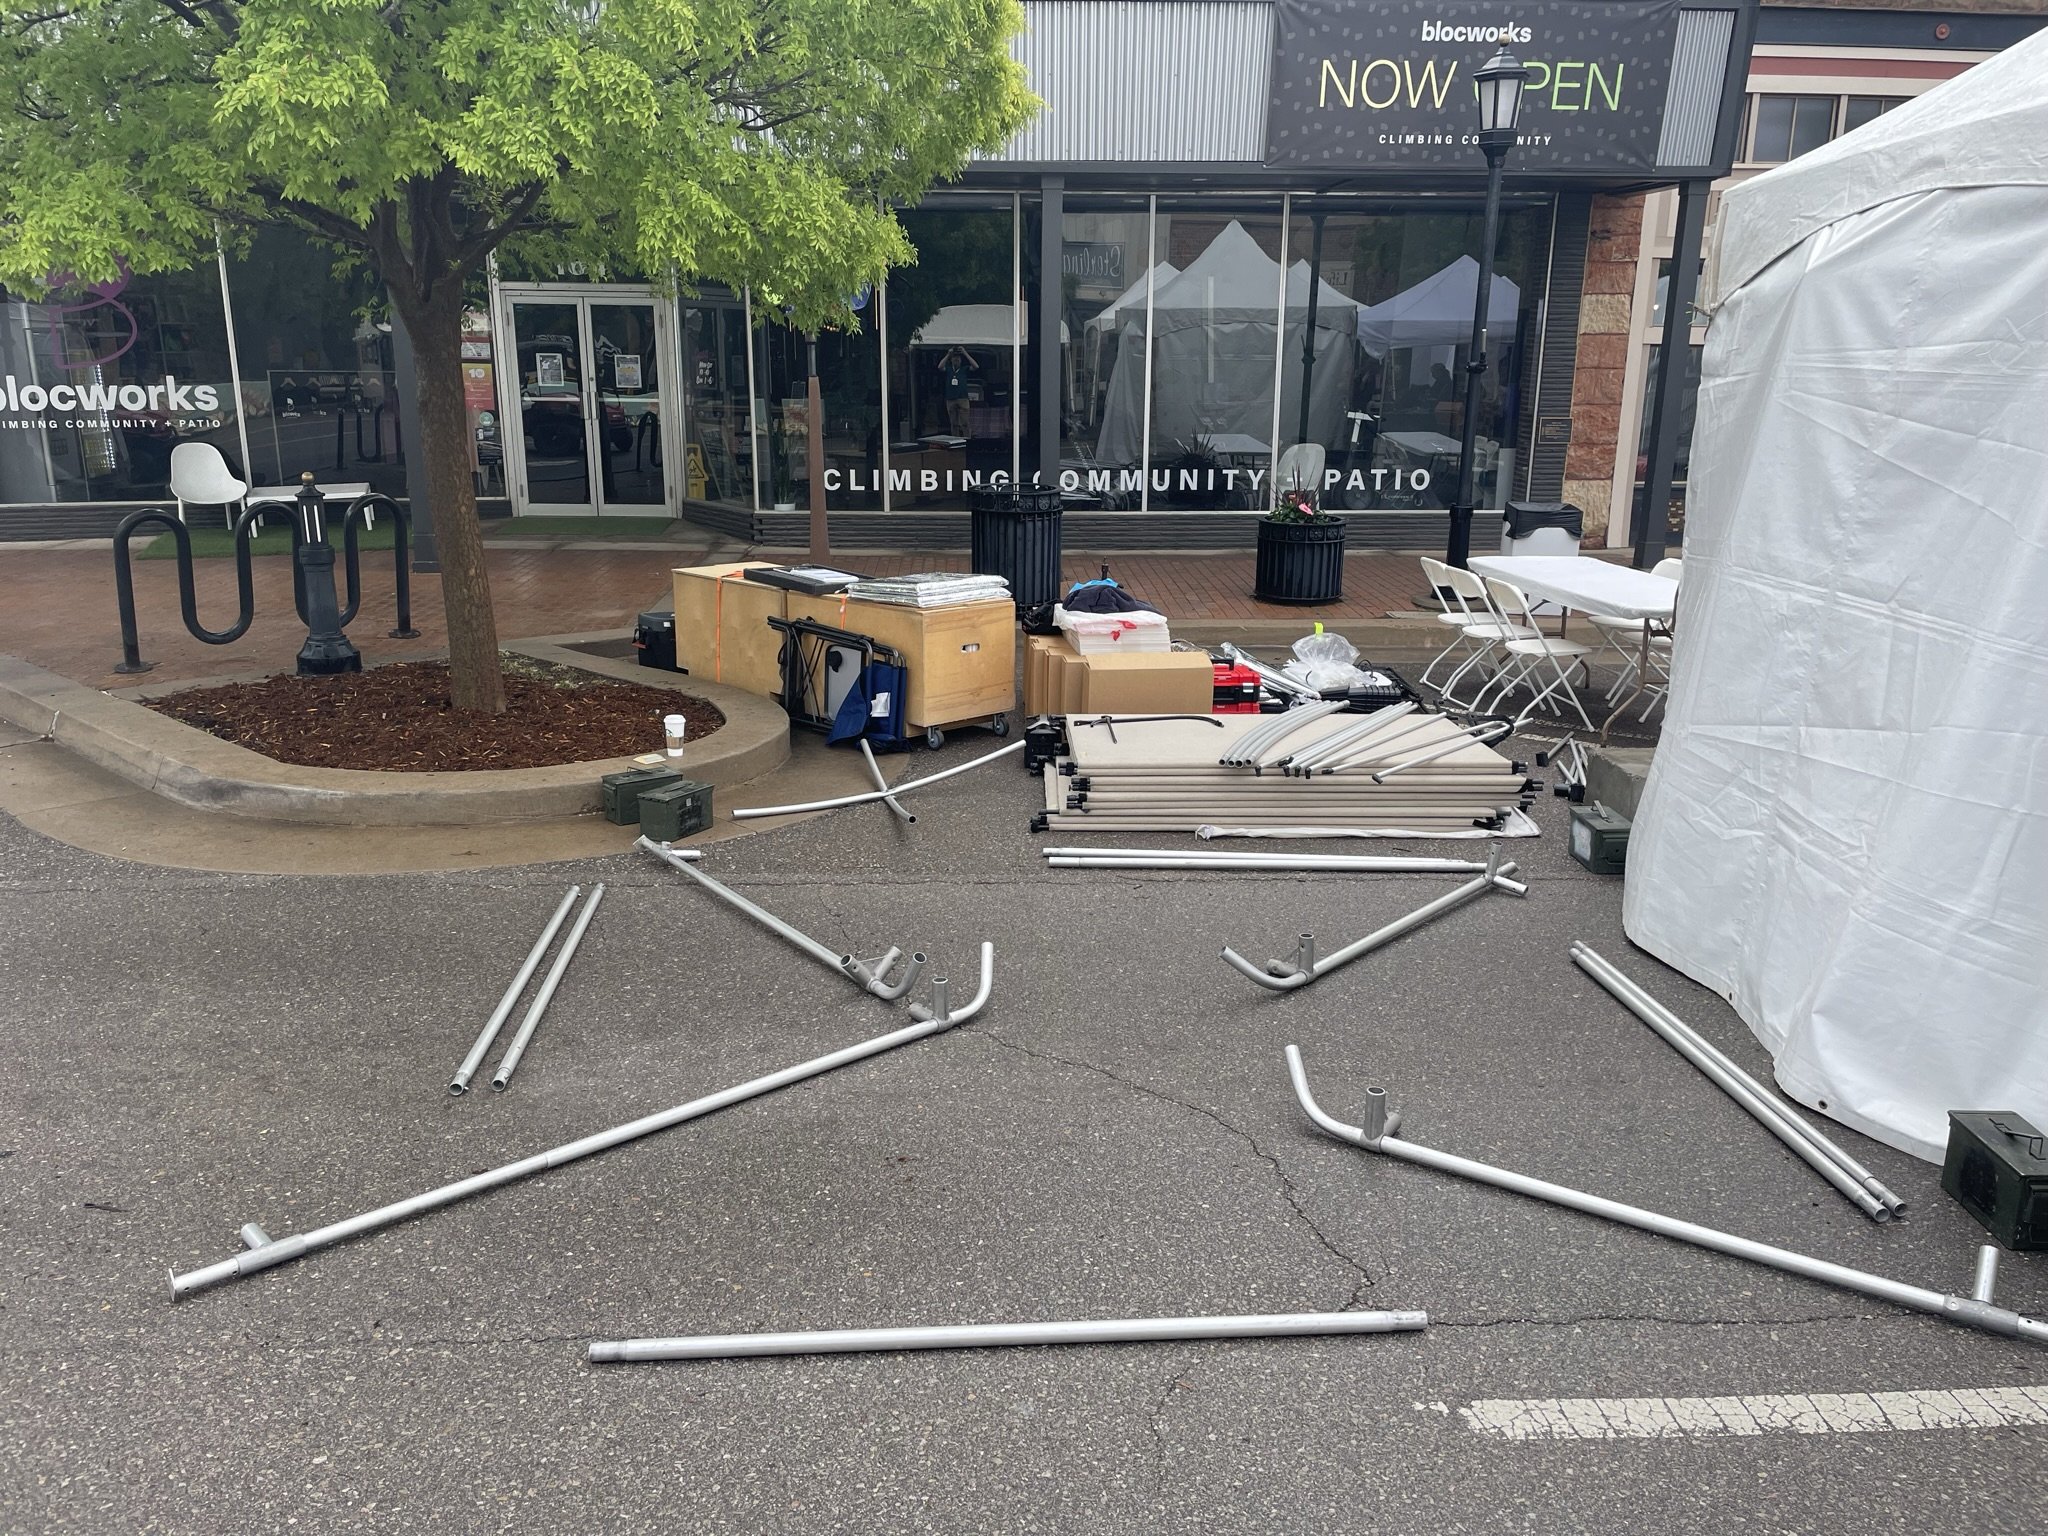
As an artist, it’s like camping: You might reserve your spot several months in advance when the weather is fine, then arrive to set up your tent in the driving rain.
It’s like camping, except you don’t sleep in your tent (maybe!)
It’s a place where you might see a visitor hold a giant turkey leg with one hand as they try to buy a piece of jewelry with the other.
It’s a place where you can get asked if you were really there when you took those pictures.
It’s an event where you are having so much fun engaging with visitors and your neighboring artists that you don’t realize until later that you were on your feet for 8-10 hours and need to drink more water!
It’s a lifestyle!
Terminology:
“Art Festival”, “Art Fair”, “Fine Art Show”, “Arts and Crafts Festival”, “Fine Arts and Crafts Fair”, “Street Fair”, “Craft Show”, “Why are all these people in the street?”
…HELP!
I offer a glossary to help demystify the jargon. These definitions are mine, and may be aspirational rather than what they appear in practice.
Art Festival: This type of event offers more than just art. It can offer a wide array of live music, an extensive food court, hands-on events for kids, a beer and wine area for adults, and it can change its character as it goes into the night. It might have multiple music stages where you may hear the medley of symphonic indie rock blasting from one side of the show, and electronic country R&B fusion from the other. Who comes out to these events? Everybody and their dog! It’s a city-wide extravaganza!
Art Show / Art Fair: More focused on the art, less focused on being a festival. Might have a food court and a stage with live music. Audience: people looking for art.
Fine Art Event: A collection of artists chosen by a panel of qualified art jurors to fit a specific set of media, be of a certain quality, and possibly fit an overall narrative. Food may include catered fine dining. If the event has music, it may include a jazz ensemble. (Consider this a traveling art gallery.) Audience: art collectors, businesses and organizations.
Arts and Crafts Festival: Includes an equal mix of fine artists and craft artists. (See “Art vs. Craft” below.) Audience: everybody.
Craft Fair: Leans heavily toward craft instead of fine art. Audience: anybody who’s looking for crafts.
For the sake of words, I will use “art festival” or “show” to refer to an event. And I apologize in advance if I use “event” to refer to a festival. Clear as mud! ;)
Why art festivals? Shouldn’t you put your work in a gallery?
Art galleries are fine, and there’s nothing stopping you from doing both. I won’t go into too much detail on galleries, as this article is all about festivals.
Generally, galleries offer professional representation for artists. What does that mean? The gallery will present your work in a consistent and safe environment, offer marketing and promotion, handle the sales of all work, and sometimes handle the delivery and installation to the client.
With an art festival, the event will provide a space for you to install your display, and you are free to present and sell your work however you see fit.
With your work in a gallery, you have the freedom to go back to the studio and create while a team of professionals sells your work on your behalf.
With a festival, you are doing a several-day meet and greet with the general public.
As for cost, galleries take a percentage from each sale, while festivals charge a flat fee to attend.
Is this a business?
It can be. As you gain experience with art events, registering as a business may help.
Most shows require that you collect and remit sales tax. If you are a business, reporting taxes will be a part of regular operations. If you are not a business, and therefore not already reporting taxes, each event will provide a tax form.
Do you need an accountant? It doesn’t hurt! This can help sort out the financial side. This can also help you find deductions for your art that you might not have thought of!
Insurance
I recommend insurance. It’s peace of mind for all the what-if’s — What if your art is damaged? What if a storm blows your booth all the way to Nebraska? What if someone decides to sneak in and sleep in your booth overnight and then defecate all over the place? (I know a guy that happened to.)
The main insurance plan for artists at art festivals is “Inland Marine”. Think of it this way: your art booth represents your company, it contains your goods, and it moves around the country (just like a boat!)
One of the most popular insurance companies for art festival artists is ACT Insurance. (As of writing), their costs start at $285 for an annual plan, and $49 for per-show coverage.
II. Art

Is this art?
Art vs. Craft
There is a lot of overlap between these ideas, however the extreme examples are obvious:
Art can be a visual piece that pushes the definition of what the creative spirit means to human expression on a fundamental level.
Some art gets a bad reputation when it seems esoteric and unrelated to our day-to-day life.
Craft can be considered ‘approachable art’, something seemingly anyone can do with things around the house. Craft can include things like modified household items, decorations, food, candles, hand towels with cute messages on them, or holiday ornaments.
Craft gets a good reputation when it explores concepts like “upcycling” – rethinking old items to make them usable with a new purpose.
Some craft gets a bad reputation when it’s items that are re-sold. (That will get a bad response from me because I consider it retail, not art. Retail isn’t a bad thing, it just isn’t what an art or craft festival is about.)
The best art is that which resonates with you. Finding and buying art is a completely personal experience.

Is this art?
Is photography art or craft?
Most art festivals consider photography to be art. On rare occasions, some events consider photography to be craft.
Most of the time, this is not an argument. Photography is considered an artistic medium and that’s that. Outside of the application process of an art festival (or gallery), the only other purpose of the distinction of whether photography is art or craft is if you want to explore the history of the medium.
Side Quest — A rocky history. How did we get here?
(If you don’t want to go on a side quest, skip the next couple paragraphs.)
The photography medium itself, as utterly world-changing as it has been, has taken a lot of criticism since its inception in 1822. Black and white photography dominated. Color photography emerged around the turn of the 20th century, but was relegated to the world of marketing and advertising. The concept of post-processing changed from ‘darkroom trickery’ to ‘artistic expression’ by way of artists like Ansel Adams. Color photography wasn’t considered artistic until the 1970s. (Thank you, William Eggleston, Joel Meyerowitz, and Stephan Shore.)
As photography transitioned to the digital realm at the start of the 21st century, it was another struggle as traditional artists argued that film was art, while digital was not. And now we’re into to world of mobile devices, where most of the photographs in the world are created and stored by the same device in our pockets that manage everything else from email, chats, social media, notes, to homework and silly videos. The mobile camera is no longer a piece of hardware, and post-processing is no longer a question. A camera is now a medley of apps which can do most of the work for you. And now there’s a struggle between “real artists who use big cameras'', and “everyone else who uses their phone.” History keeps repeating itself, but with new gadgets.
Be expressive, no matter the tool
I believe one of the jobs of artists is to reveal that any tool, no matter how ubiquitous, can be a powerful outlet for creative expression.
Recently, I have encountered some limits: Some festivals limit photographers to “limited editions only.” The logic for those events is that “artists can’t just press the print button a zillion times and call what they do unique.” Other festivals restrict the printing medium. For example, Art in the Pearl, in Portland, Oregon says this:
No photographic images printed on canvas are allowed… Signage of an overtly commercial nature listing the availability of numerous sizes, print surfaces and/or framing options is prohibited.
And what about photo manipulation? Image stacking? HDR? Collage? Digital art? All I can say is, welcome to the art world. It’s an ever-changing rabbit-hole!
Behind the scenes of making canvas prints
Types of framed images
The most popular method for displaying photography is large and hangable on the wall. There are a myriad of ways of doing this.
Framed paper print - traditional, classic
Canvas print (wrapped, or mounted) - can have a painterly appearance, due to the texture
Metal print - slick and modern appearance
Acrylic mounted - “the new hotness” - can be marketed as “elegant luxury photos.”
Some photographers are offering utterly giant photos; five to eight feet across! Why?
Consider the cost of creating an 16x24” framed piece. Consider its appearance on the wall, how does the size grab you? Now consider the cost and appearance of a 30x40” framed piece. The cost and time of creating those two sizes are not that much different, but the selling price is much higher for the larger piece. We are selling not only an image, but the gravity and impact of an image as well! The larger piece offers your booth better visibility at a distance.
Some visitors want large art. They are rare, but be ready. As for what people look like, art festivals are quite bad for trying to size up the crowd based on appearance. People are there to relax, look at art, have a giant lemonade, etc. One of my customers came in looking like he had a good day at the lake — shorts, t-shirt, flip flops, giant sun hat — and he was the Financial Manager of a large local business, looking for awesome art for his home. By day, he maybe wears a suit and tie.
Another side quest —
Photography is not like any other artistic medium. By having the choice to present a photo on a variety of substrates, this indicates that the “art” of each photo is not in the substrate. Similar to how you can swap out a frame around a painting, you can change this part of a printed photo. Additionally, you can print a photo with an Epson printer, or a Canon, or HP (or whatever), which are different formulations of pigment ink. The print may be different, but again the fundamental nature of the photo doesn’t change. You can’t do that with, say, sculpture because the substrate is inherent in the piece: Donatello’s “David” is bronze while Michelangeo’s “David” is marble.
What exactly is a photograph? If your answer cannot contain any of the following: the frame, the substrate (paper, canvas, metal), or even the ink it’s printed with, what are we actually selling?
On the flip side, I think it’s in the best interest of the visitors for us to downplay this mystery about what we make. Let’s leave such a debate for another event, say a demonstration or lecture for an art group! (Yes, be ready to have groups come to you based on your booth!)
Solution: Choose one type to display on the wall, whether it’s metal, canvas, acrylic, paper. Then offer smaller ones in the bins — and those can be paper, or small frames. Each of them can be limited or open editions.
Some artists display only “show pieces”, meaning they don’t sell the ones off the wall. When someone wants to buy one, the artist will create a custom piece on demand and ship it to the customer. Their logic is that they don’t want to sell a piece that has been carried from one show to another, and may have scuffs and damage.
Tip: Offer new art every year. Your visitors may be repeat visitors, and they will be excited to see your latest work. One rule I aim for is to update 20% of the framed photos from the previous year. Keep some “main” ones, then as I make more, swap out the ones that aren’t selling as well. As a photographer, this may mean go out and shoot as much as possible! And if not, revisit your back catalog and examine old photos with new eyes.
When viewers see the same image repeatedly, it starts looking like a factory-made product rather than a personally hand-made item.
Prints (or duplicates)
Photographers can offer smaller versions of images that are not as involved as a fully-framed piece. This is where prints come in.
A note about nomenclature: If you ask a printmaker, they make prints. They use techniques like lithography, metal plates, or wood cut pieces, then apply ink, press it into the paper, then call that a print. From their point of view, when a photographer creates more than one iteration of a given image, they refer to it as a duplicate. This implies that every photograph is an original, and therefore there isn’t a “mater copy, with prints.” But for the sake of terminology, I will call them prints.
When creating prints, there are plenty of sizes to choose from, but choose strategically. It’s most helpful for your customers to choose from standard frame sizes. This helps them find frames. Also, pay attention to sizes that compete with each other: For instance, a 9x12” print is visually close to an 11x14” print. However, an 11x14” print sitting next to a 16x24” is noticeably different. On the other end of the size spectrum, a print bin of 24x36” prints looks stunning, yet consider the tradeoff of how you’re going to carry them from one show to the next.
Bring multiple prints of popular images, but avoid showing them together. (Have multiple print bins, keep dupes in a "dupe box" behind the booth, and replenish the bins when one sells.) When viewers see the same image repeatedly, it starts looking like a factory-made product rather than a personally hand-made item.
Financial note of offering prints: If you offer prints, your sales will be mostly prints. They will help you cover your costs and will (as a friend puts it) “nickel and dime you to prosperity.” When you sell a framed piece, that’s quite satisfying!
If you do not offer prints, consider the mindset that each piece is important.

How do you price your work?
Legal note: I have to be careful not to engage in price fixing. Even though my prices are clearly visible on my website, they were calculated for my specific financial situation. Please calculate what is best for you.
Consider factors going into your work:
How much are you spending on materials to create your work?
How much time are you spending on making each piece? (For travel photography, how much do you spend on traveling to these locations?)
How much are you spending on getting into art festivals? (Booth fees, travel, food, lodging.)
Is this your only source of income?
How much is your time worth?
What inherent qualities are in your pieces that command a given price? (And can you communicate it to visitors in a few seconds?)
(And for the ‘duh’ statement…) If you want to make money, your selling price must exceed your cost.
Price your items with even numbers (multiples of 5 and 10). This makes cash transactions easy so you don't have to make as much change.
Business tip: You have to pay yourself. In other words, you are running a business which has one employee. The business receives income for the items it creates, then pays the expense to cover its employee – you. How much are you worth? And therefore, how much overhead should you add to the price of your items? If you worked for a company that did all that you are doing, wouldn’t you want a fair salary from it?
Biography / “Certificate of Authenticity”
With each piece, offer a little document with the work. Share with your customers a little bit about each piece: Why is it important to you? How did you make it?
It can be as simple as a copy of your biography with a couple lines about when and where you took the photo, or as involved as a poetic exploration of the emotions you felt as you shot each piece, and how you were compelled to present them on metal, canvas, or handmade tweed because of how the surface communicated the emotional significance of each subject.
If you are offering your work in limited editions, this is where you would specify the details of the edition: total quantity in the set, which print this is in the set, the physical dimensions, the substrate (type of paper, canvas, metal, acrylic)
One of the most impressive solutions for this is Peter Lik’s serialized and numbered hologram.
III. Booth
Display your work
This is when you get to design your own personal art gallery. As a creative person, this can be one of the most exciting parts, after creating the work itself!
As people browse the entire show, sometimes they will look without stopping. This section offers tips on helping you get and hold their attention – enough for them to come inside booth.

Ask yourself, what will viewers see first when they approach your booth? Does your portfolio have a hook, or a “gravity piece”? Do you have visually strong images that either sum up your portfolio in a single piece, or are overall attention-grabbing. If so, make it visible and obvious. Consider even offering a version that’s larger than the other photos in the booth.

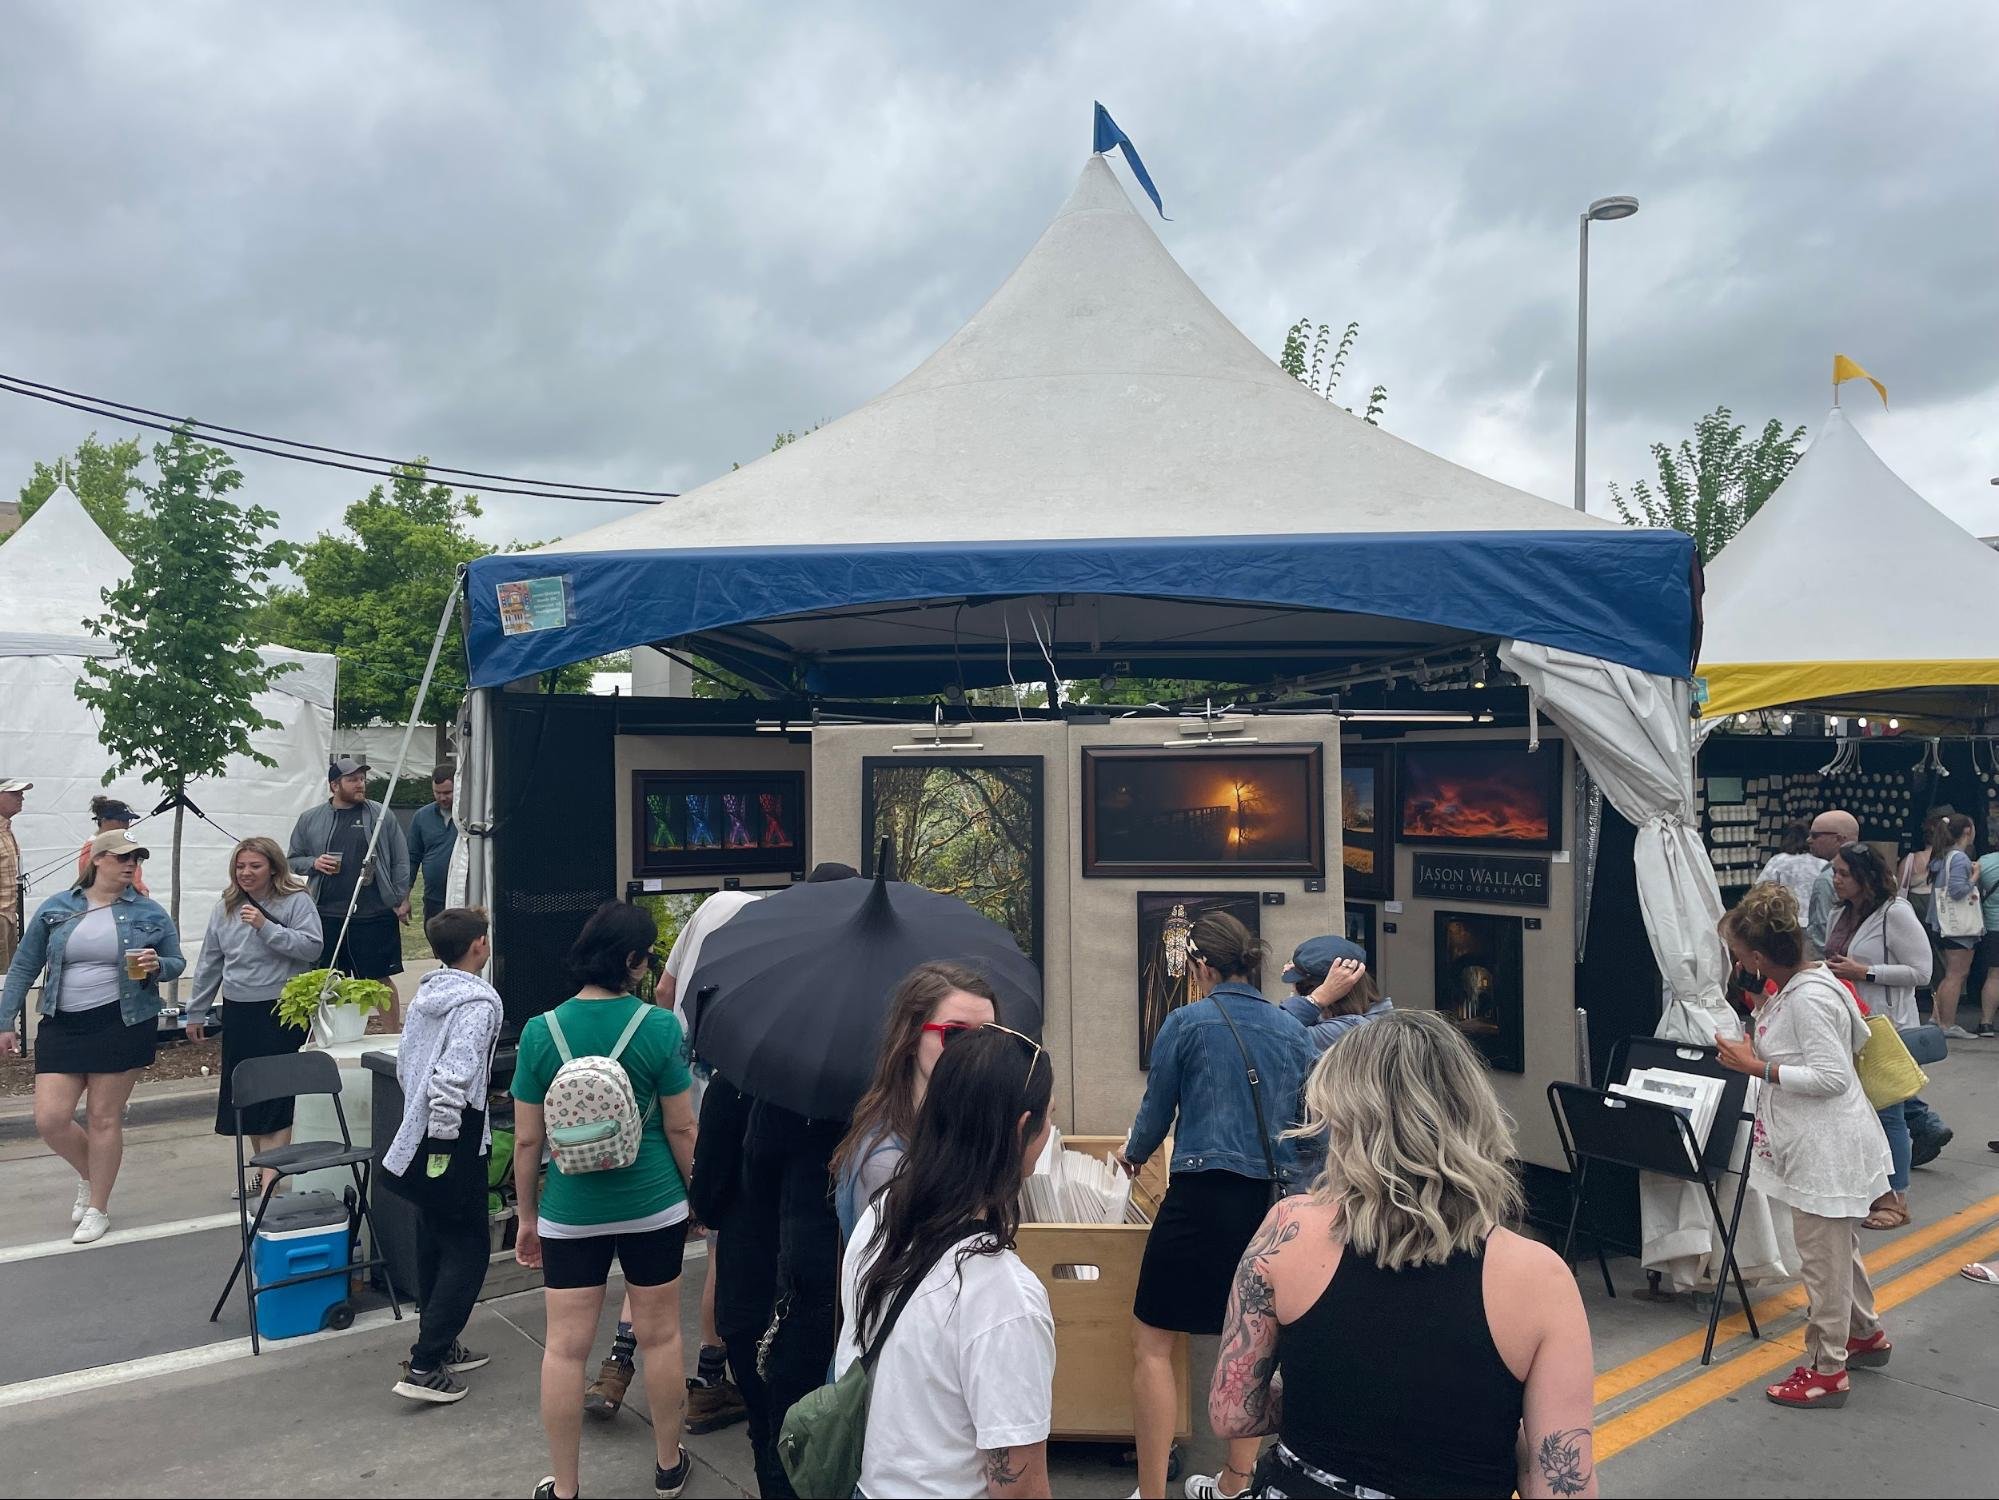
Corner booth, extending outside the 10x10 space with three print bins, an awning and an extra panel
Consider creating a flow, or a narrative with the images in your booth. Group similar images together by size, color and subject matter.
Test the visual appeal of the booth by setting it up at home (inside, or out in the yard). Do some tests: Ask friends to walk past it while looking at it, and ask them later what they remember seeing. Did they feel like stopping and walking in? If so, great! If not, what would the booth look like so that it would communicate what you want them to see?
Equipment
Generally you need two things:
a display method - something to hang work on
and a tent (or “canopy”) to put the display inside
The combination of the two is your booth.
Size
Traditionally, booths are 10x10 feet square. Likewise, shows tend to offer space according to the size of the booth. A double booth is 20x10, so it’s one booth the size of two. If you have a double booth, you would apply for a show that offers double booth spots.
If a show allows, you may have instances where you can extend outside the 10x10 space. Most shows tend to align booths together in a line. If that’s the case, you will likely not be allowed to extend anything out the front of your booth. If there’s space behind your booth, that’s storage!
Some shows offer what is called a corner booth, meaning the booth location is at the end of a line of booths. It could be at the end of a row, or a city block, or to allow for landscaping features, or in a group to allow for foot traffic to flow better. Whatever the reason, this location allows for viewers to see your booth from two directions: front and side. This can be useful! Hang work on the side of your booth, and open the side of your both to allow people to enter from the second direction. Expand a little bit by including a print bin or two. Corner booths are generally more expensive than a 10x10 booth because of those advantages.
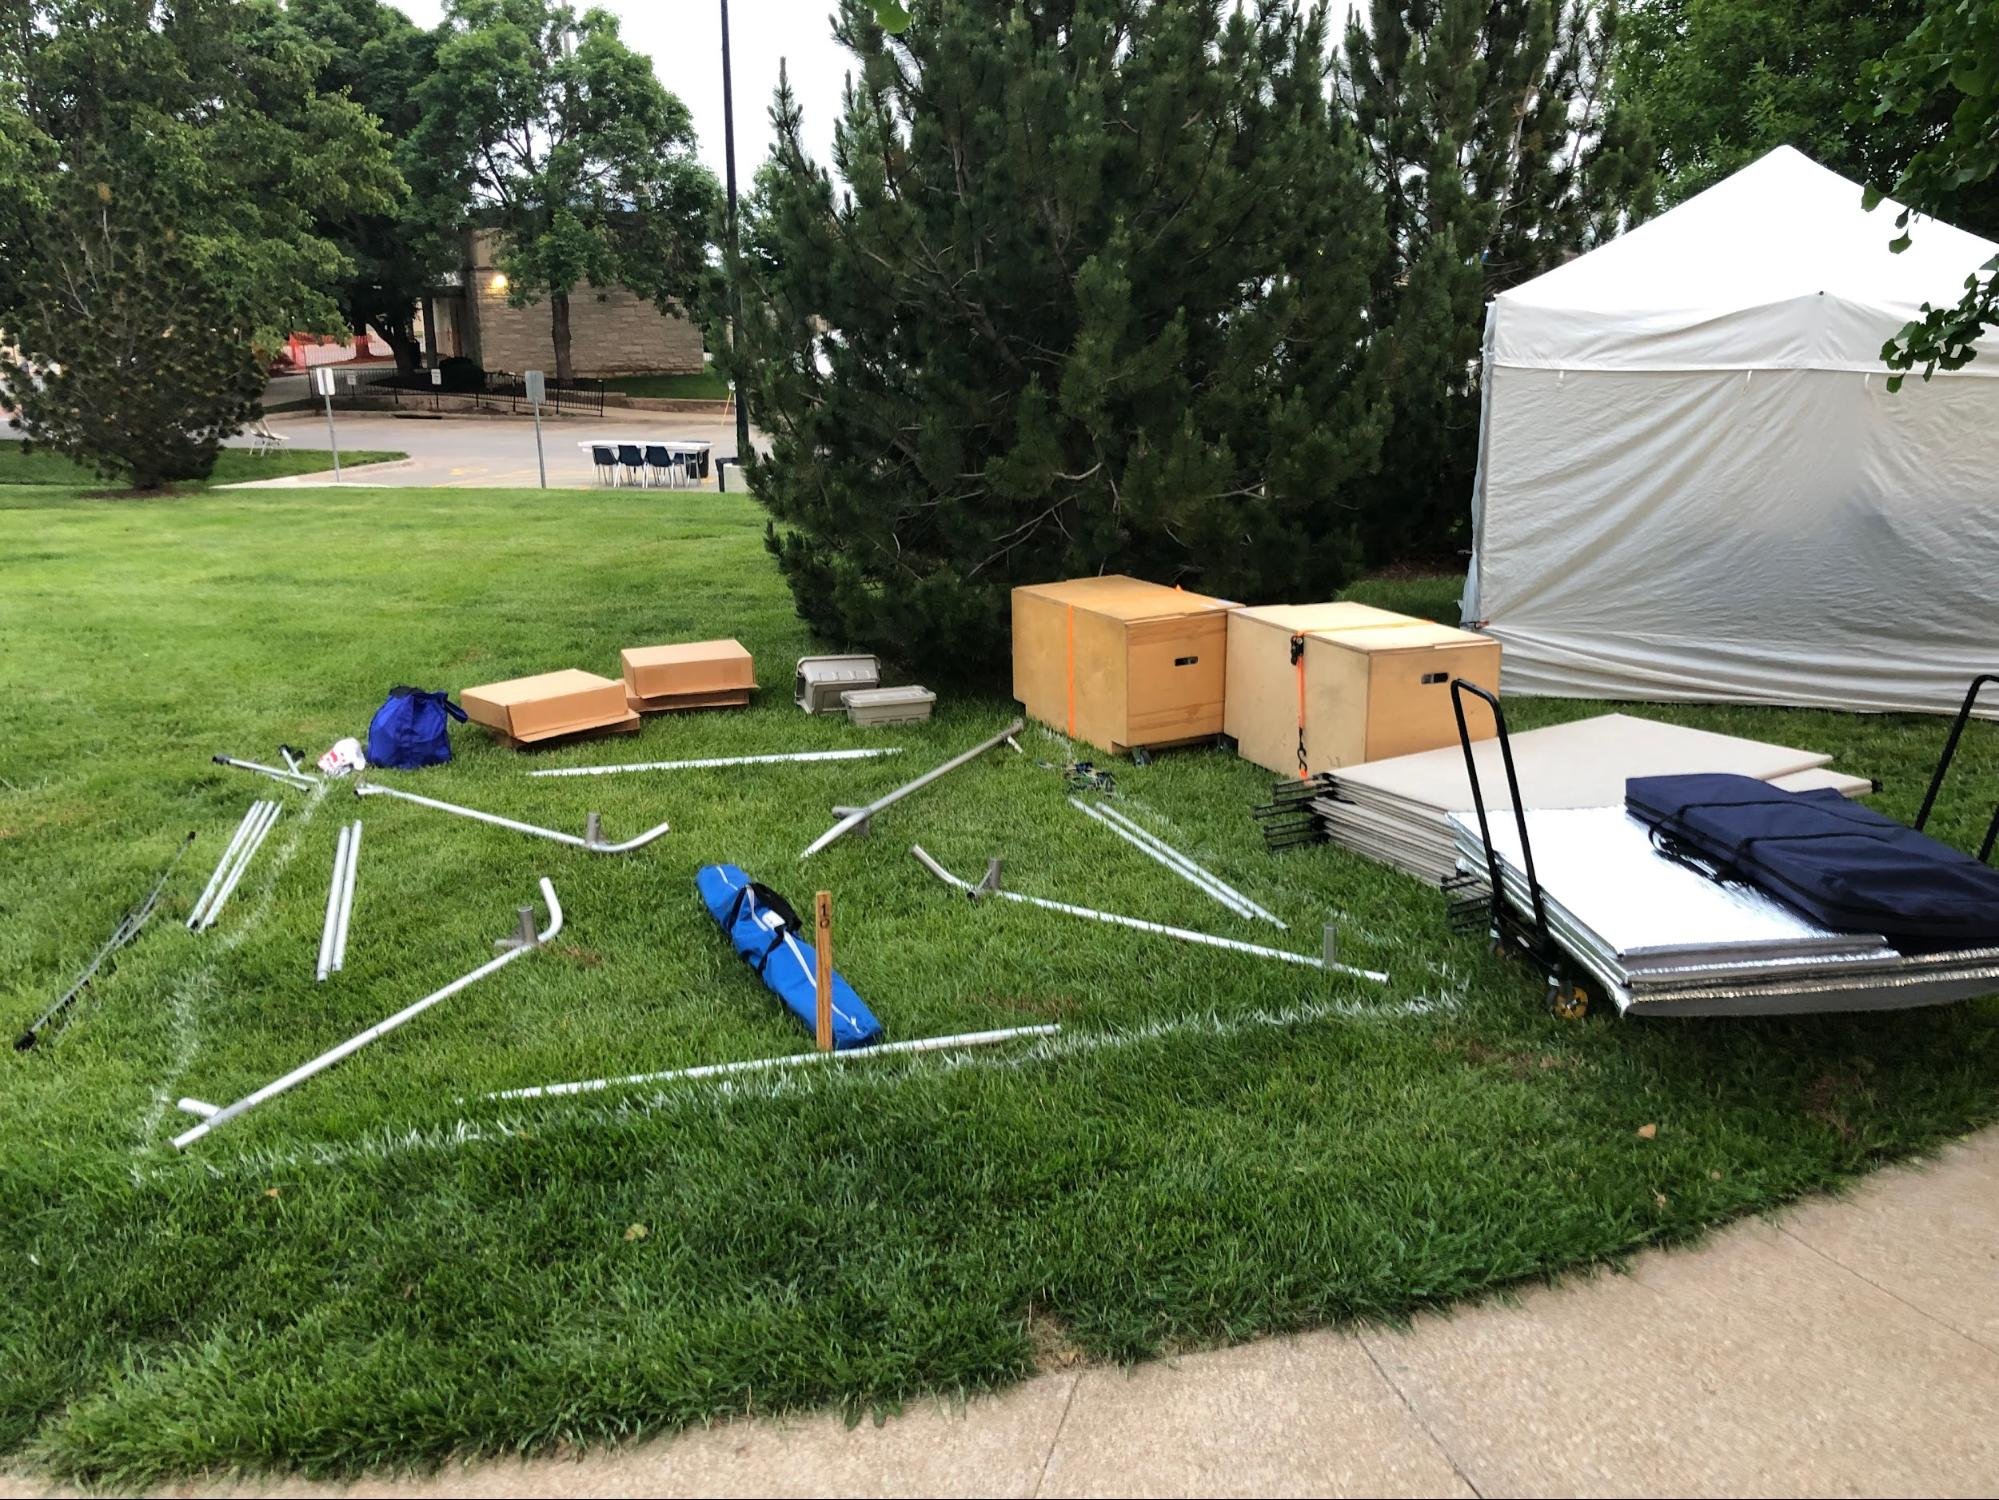
Some shows spread out the booth spots so the booths aren’t even touching. (This especially happens when a show is in a grassy park.) If this is the case, the 10x10 space is a vague notion of where the center of your booth is. You can likely use that space however you want, and sprawl out with some creative freedom.
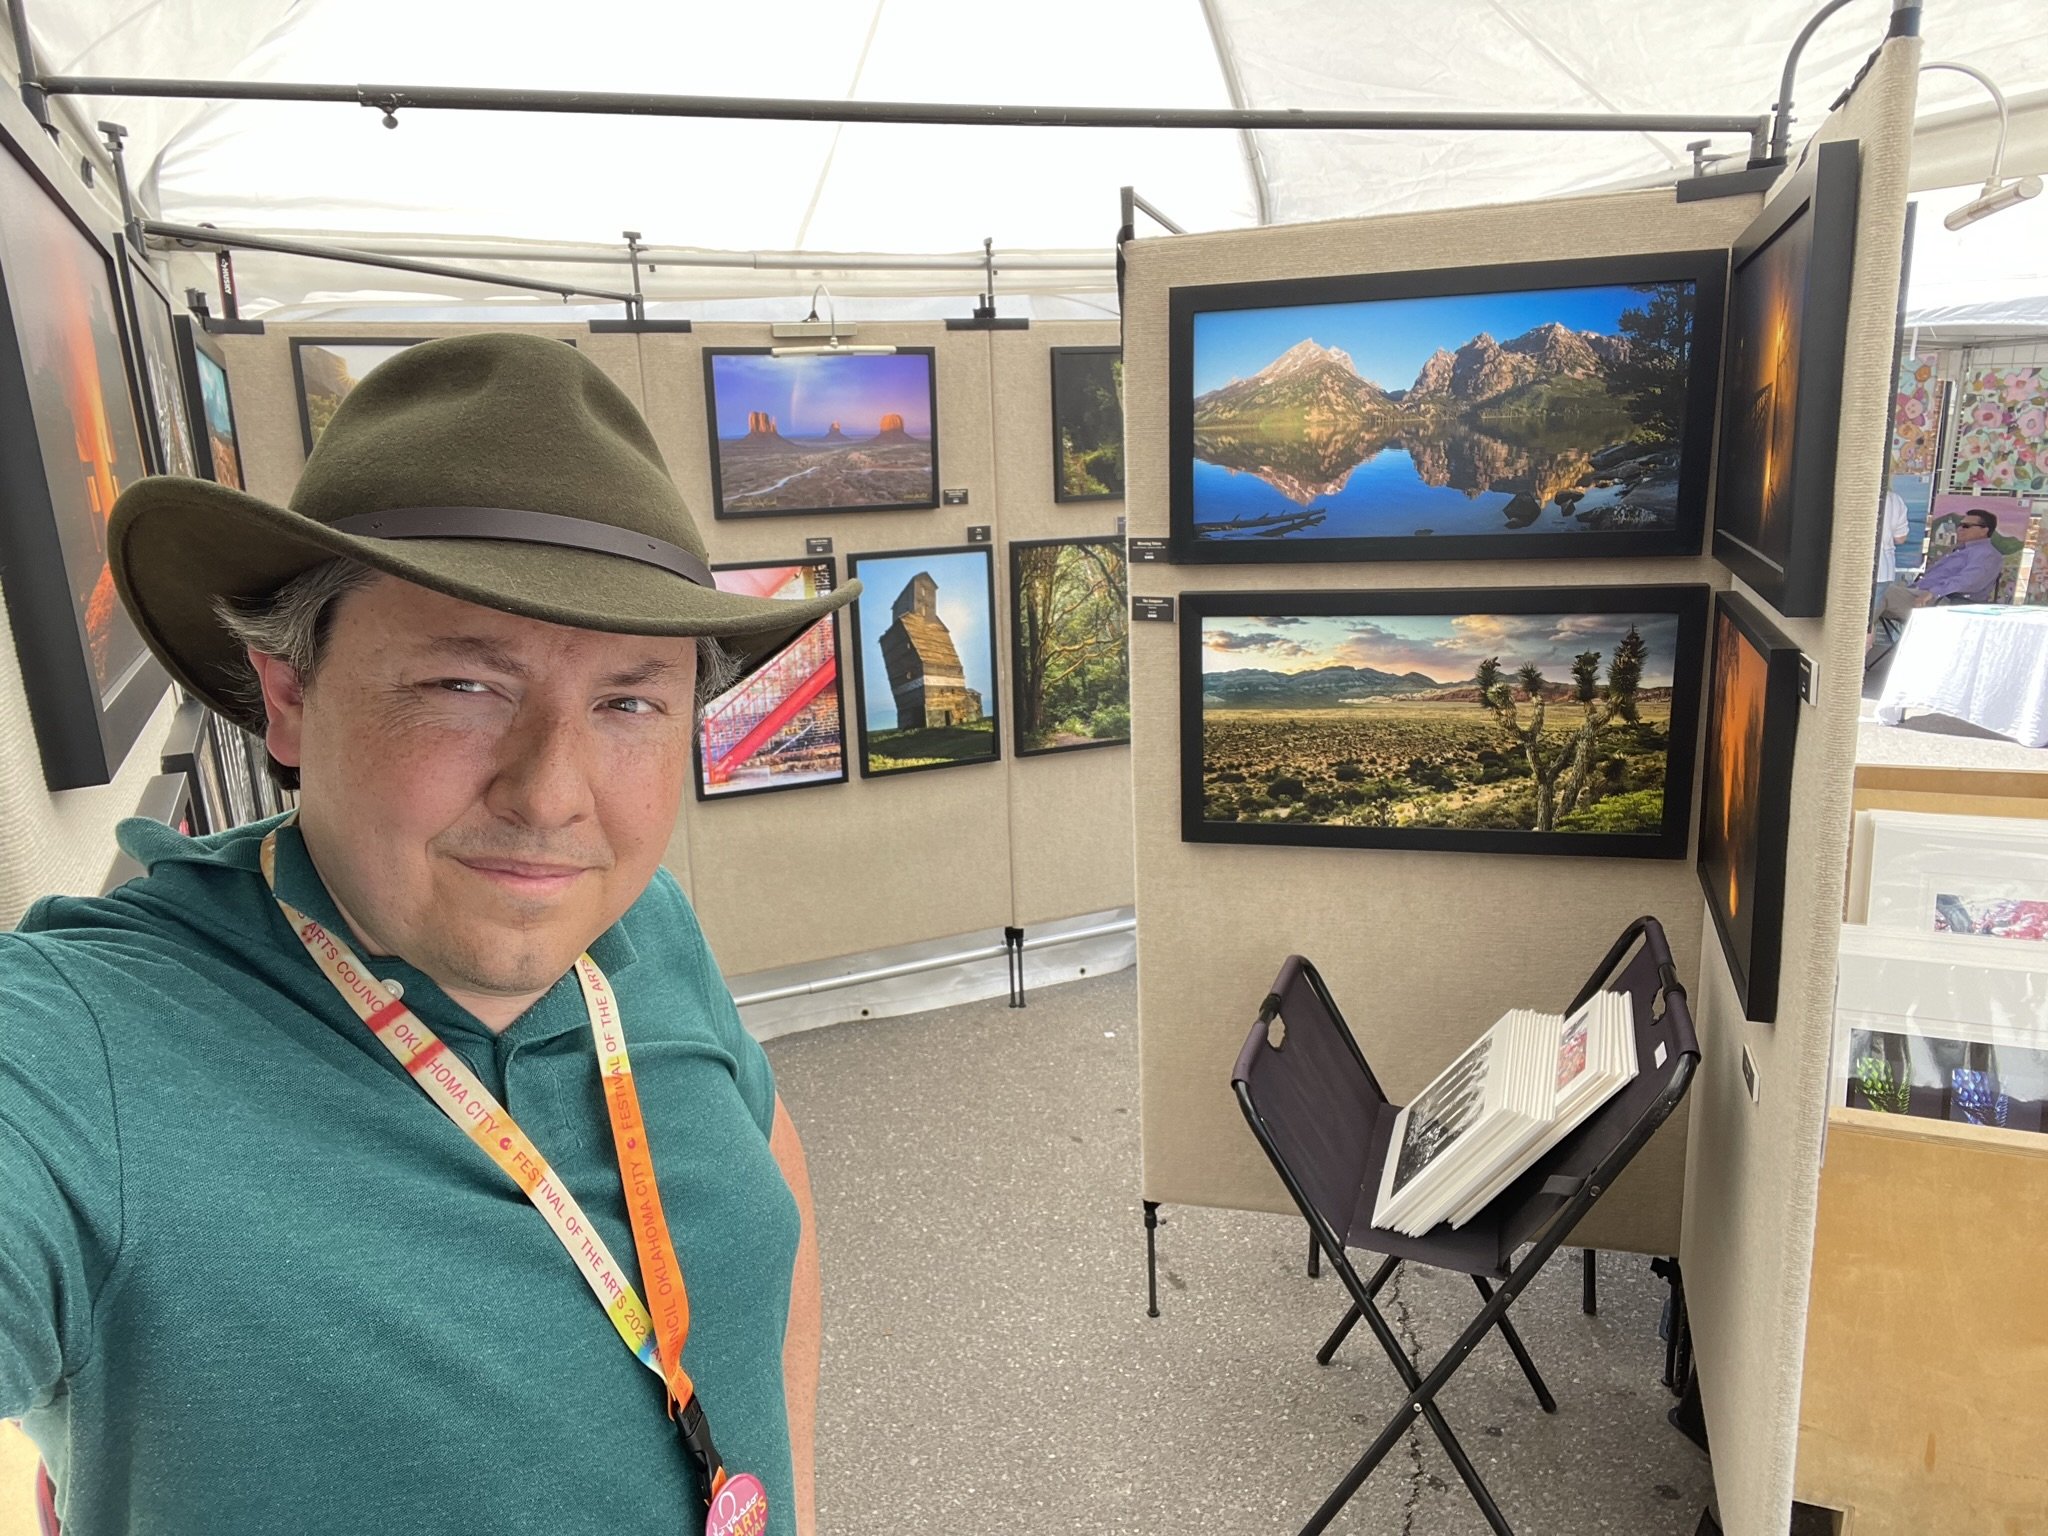
Unique sizes: The Oklahoma City Festival of the Arts offers corner booths for everyone! They provide the tents, so all we have to bring is the displays walls! However, each booth is a triangle where the insides are 14 feet long, not 10. We’re creative people, and we definitely have to be creative to fit our displays into those spaces.
Types of tents
Pop-up tents
The major player in this realm is the brand Ez-Up. You can find them at Costco, Sam’s, Target. The main advantage is these tents are inexpensive: $100 to $300. Another big advantage is that they are comparatively easy to install.
(Here’s where I would mention more details about these tents. The trouble is I’m not familiar with them.)
The pop-up tents are fine for a one-day event when there's no wind. However, they are no match when the wind and weather gets nasty. Some larger art festivals ban pop-up tents because those are the first booths to struggle in the wind. And if a booth gets airborne, the situation gets dangerous.
Stronger canopies
Light Dome (this is what I use)
Those tents are made of pipes (aluminum or steel), and can better withstand the elements.
Cost: They start at $850 and can go to $2,000 with all the bells and whistles. The accessories include: awnings, stability bars, fabric sides with windows and things.
And that’s for a 10x10 tent. A 10x20 is double the size, so expect to double the cost.
To save on cost, search Facebook Marketplace for used tents.
Types of displays
Carpeted walls offer an elegant presentation, they are easy to install, and compatible with velcro, which is great for hanging up signs and even the artwork itself.
Propanels.com (this is what I use for walls)
Those are not the only options. I’ve seen artists with grid wall, home-made solutions. The sky is the limit!
Tip about Pro Panels: Use the extended legs to your advantage. If your van can only hold six-foot panels, that doesn’t mean your booth will only be six feet tall — the extended legs will make your booth an extra foot taller.
Tip about Propanels vs. Armstrong: Their parts are compatible. I use the panels from Pro Panels, and some connecting parts and a podium from Armstrong. They work great together!
Height of tents and displays
A default size is 7-8 feet tall. This means the tent has the space for 7-foot or 8-foot tall panels. (or 7-foot panels with extended legs)
Some artists are pushing the limits of what’s possible. I recently saw an artist using a double-wide tent that goes 10 feet tall, and used 10-foot Propanels! The company does not offer this on their website. You have to call them, order them over the phone, and then pick them up in person.
The large displays look epic. However, if you want to go this route, you will need a way to carry it all: using a cargo van or moving truck is a given. Also, you’ll need to make sure the booth stays standing. The taller the tent is, the more of the sky (wind) you’re exposing yourself to.

Make your booth sturdy and solid
No matter which type of tent you get, do everything you can to make sure it stays put for the duration of the show.
Two principles to consider:
Attach the canopy to the earth, so it doesn’t get blown away.
Make the booth sturdy in itself, so it doesn’t wobble or bend.
Without being attached to weights, these tents are like giant umbrellas or small airplane wings. They want to take flight, and it’s our job to keep them from exploring that part of their nature.
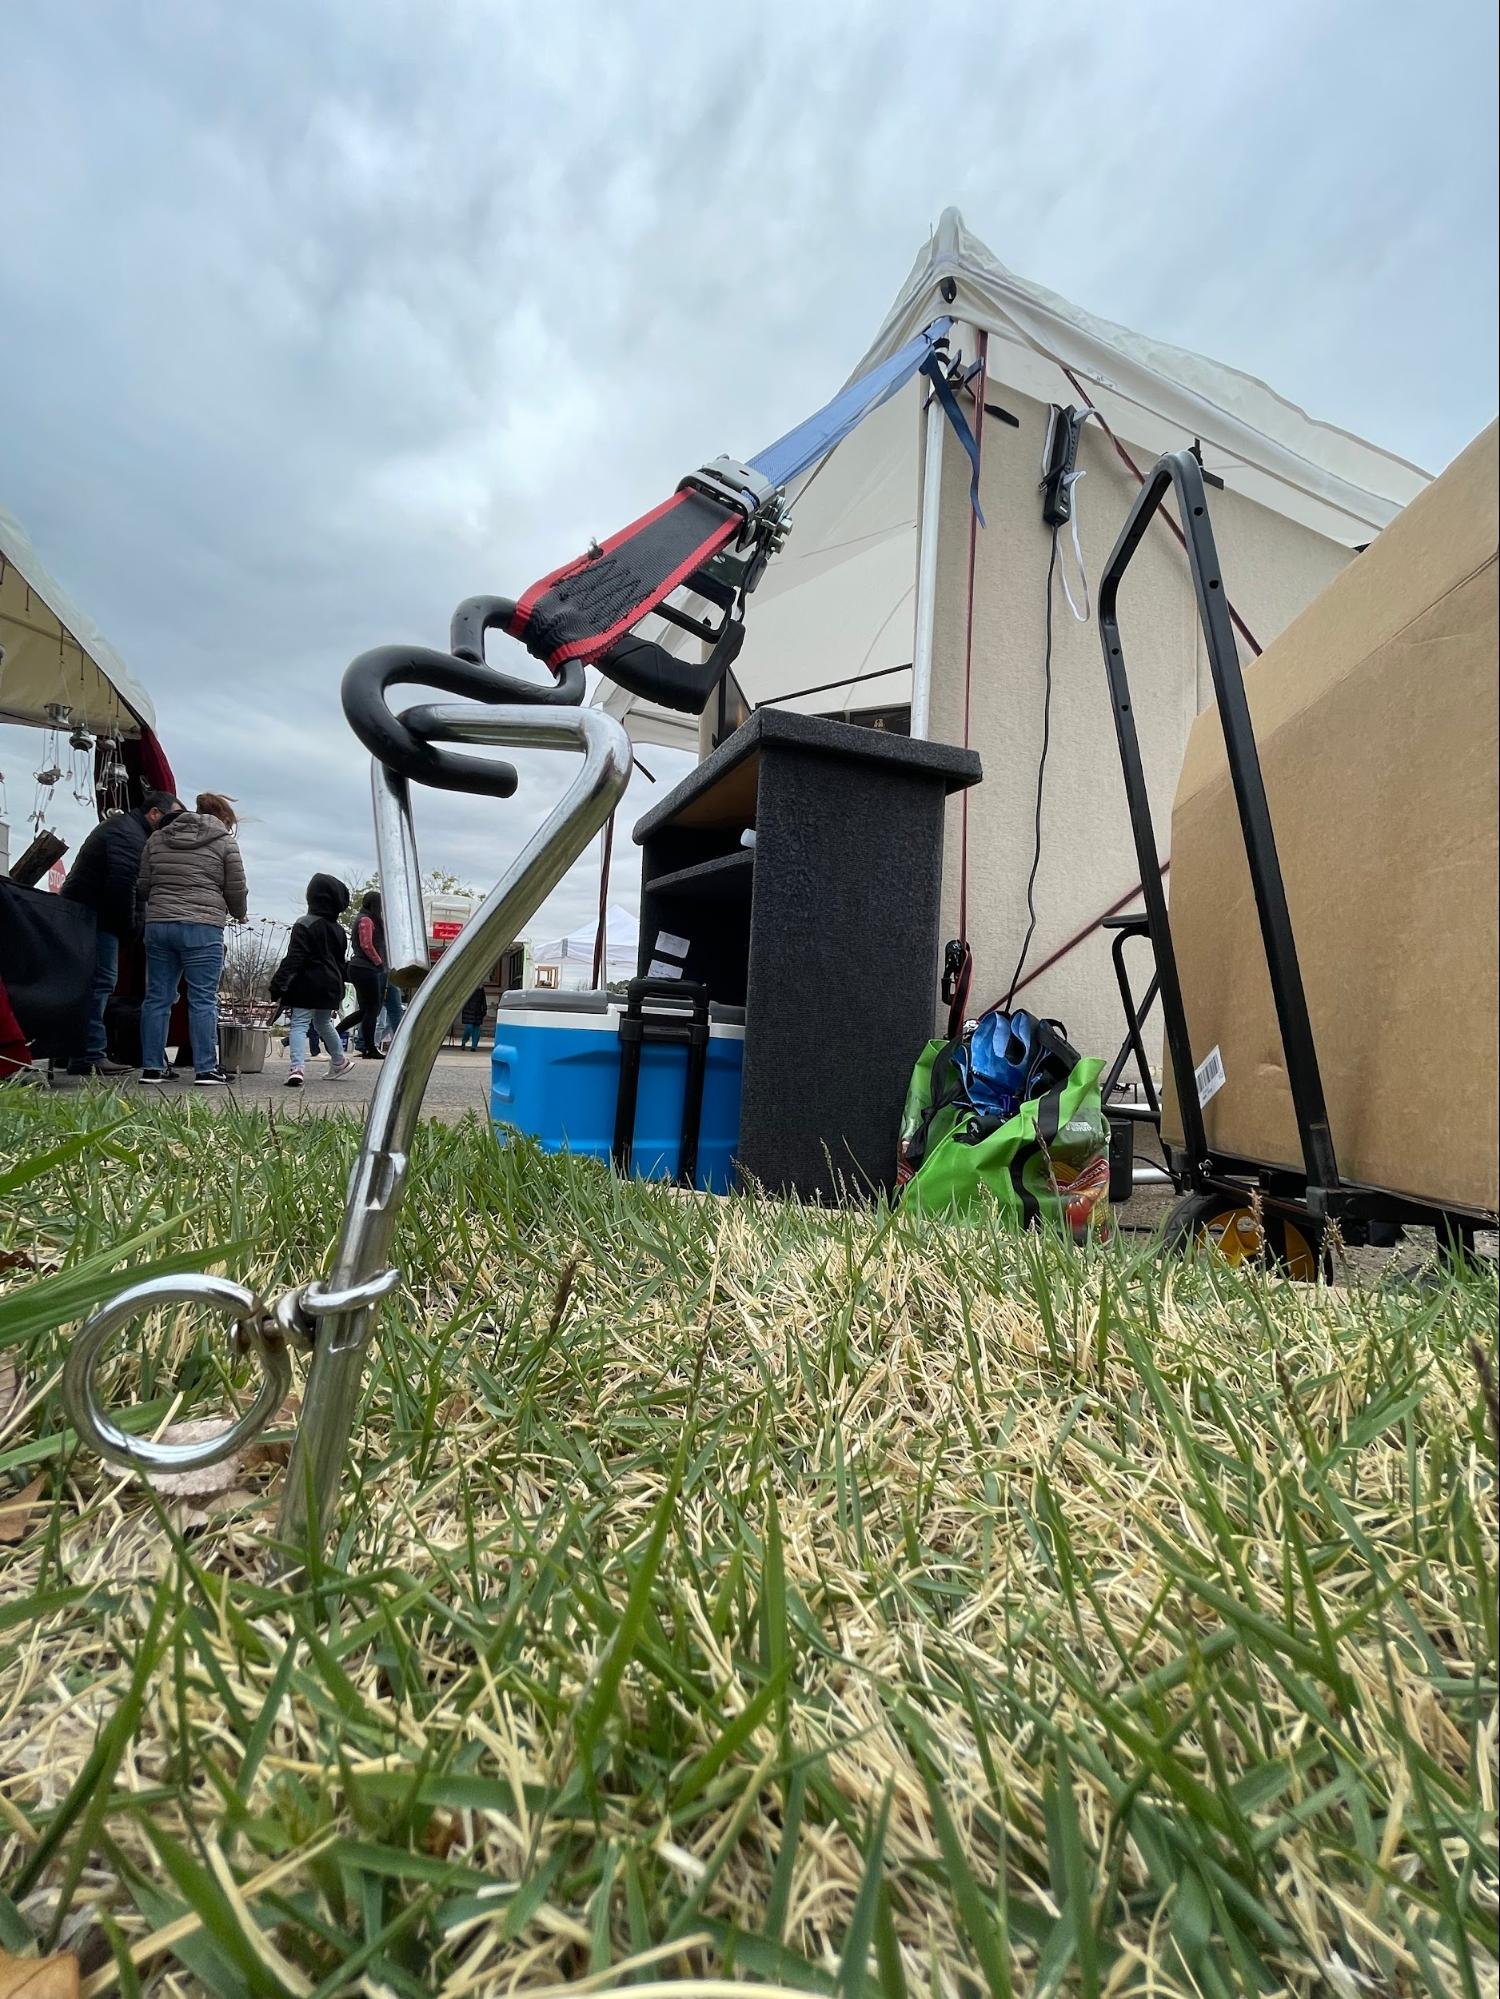
Weights or tent stakes:
Always check with the show for what they recommend for tying down your booth. Some shows are set up on grassy areas, and this means you are likely able to use tent stakes. Spiral tent stakes are great for this.
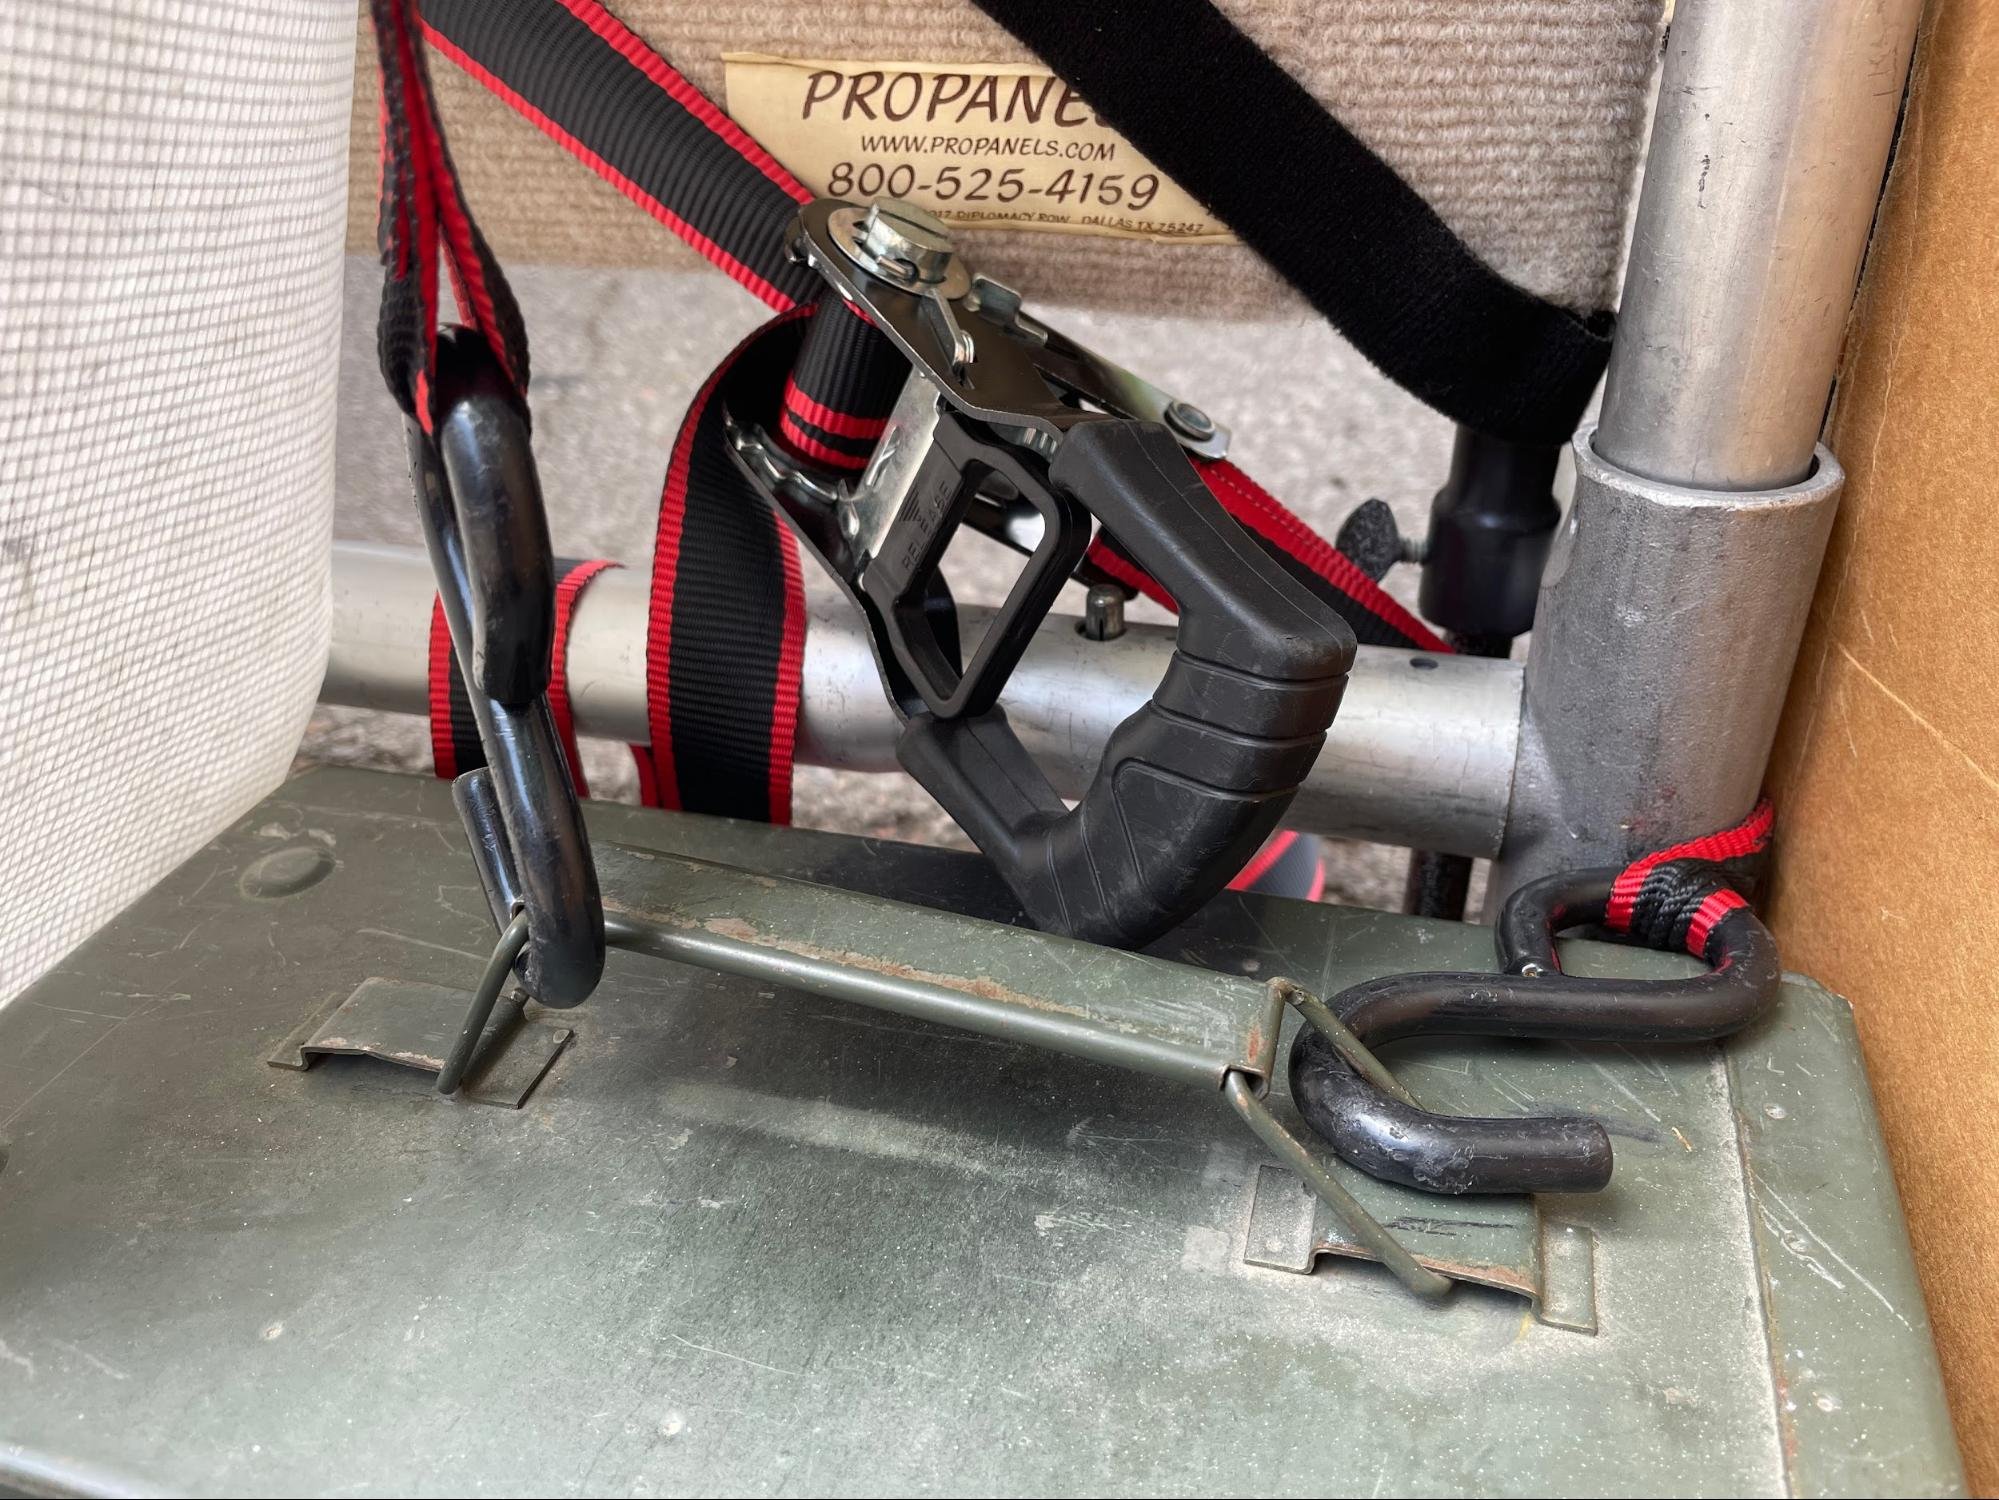
If the show doesn't allow you to stake to the earth (say, you’re doing a show in a street, or you’re at a show that is in a park that has irrigation), get at least 60 pounds of weight on each corner.
Personal note: I use ammo boxes with metal plates from a surplus weight machine. Each box hold seven plates, and therefore is 70 pounds.
Stabilize the booth:
Stabilize the booth by interconnecting the panels along the top, and across the booth. Pro Panels and Armstrong each offer comprehensive systems with support bars and tent hooks:
Use these supports to connect the panels using the upper pegs. Then use dual-sided wrapping velcro to attach the panels to the poles of the canopy.
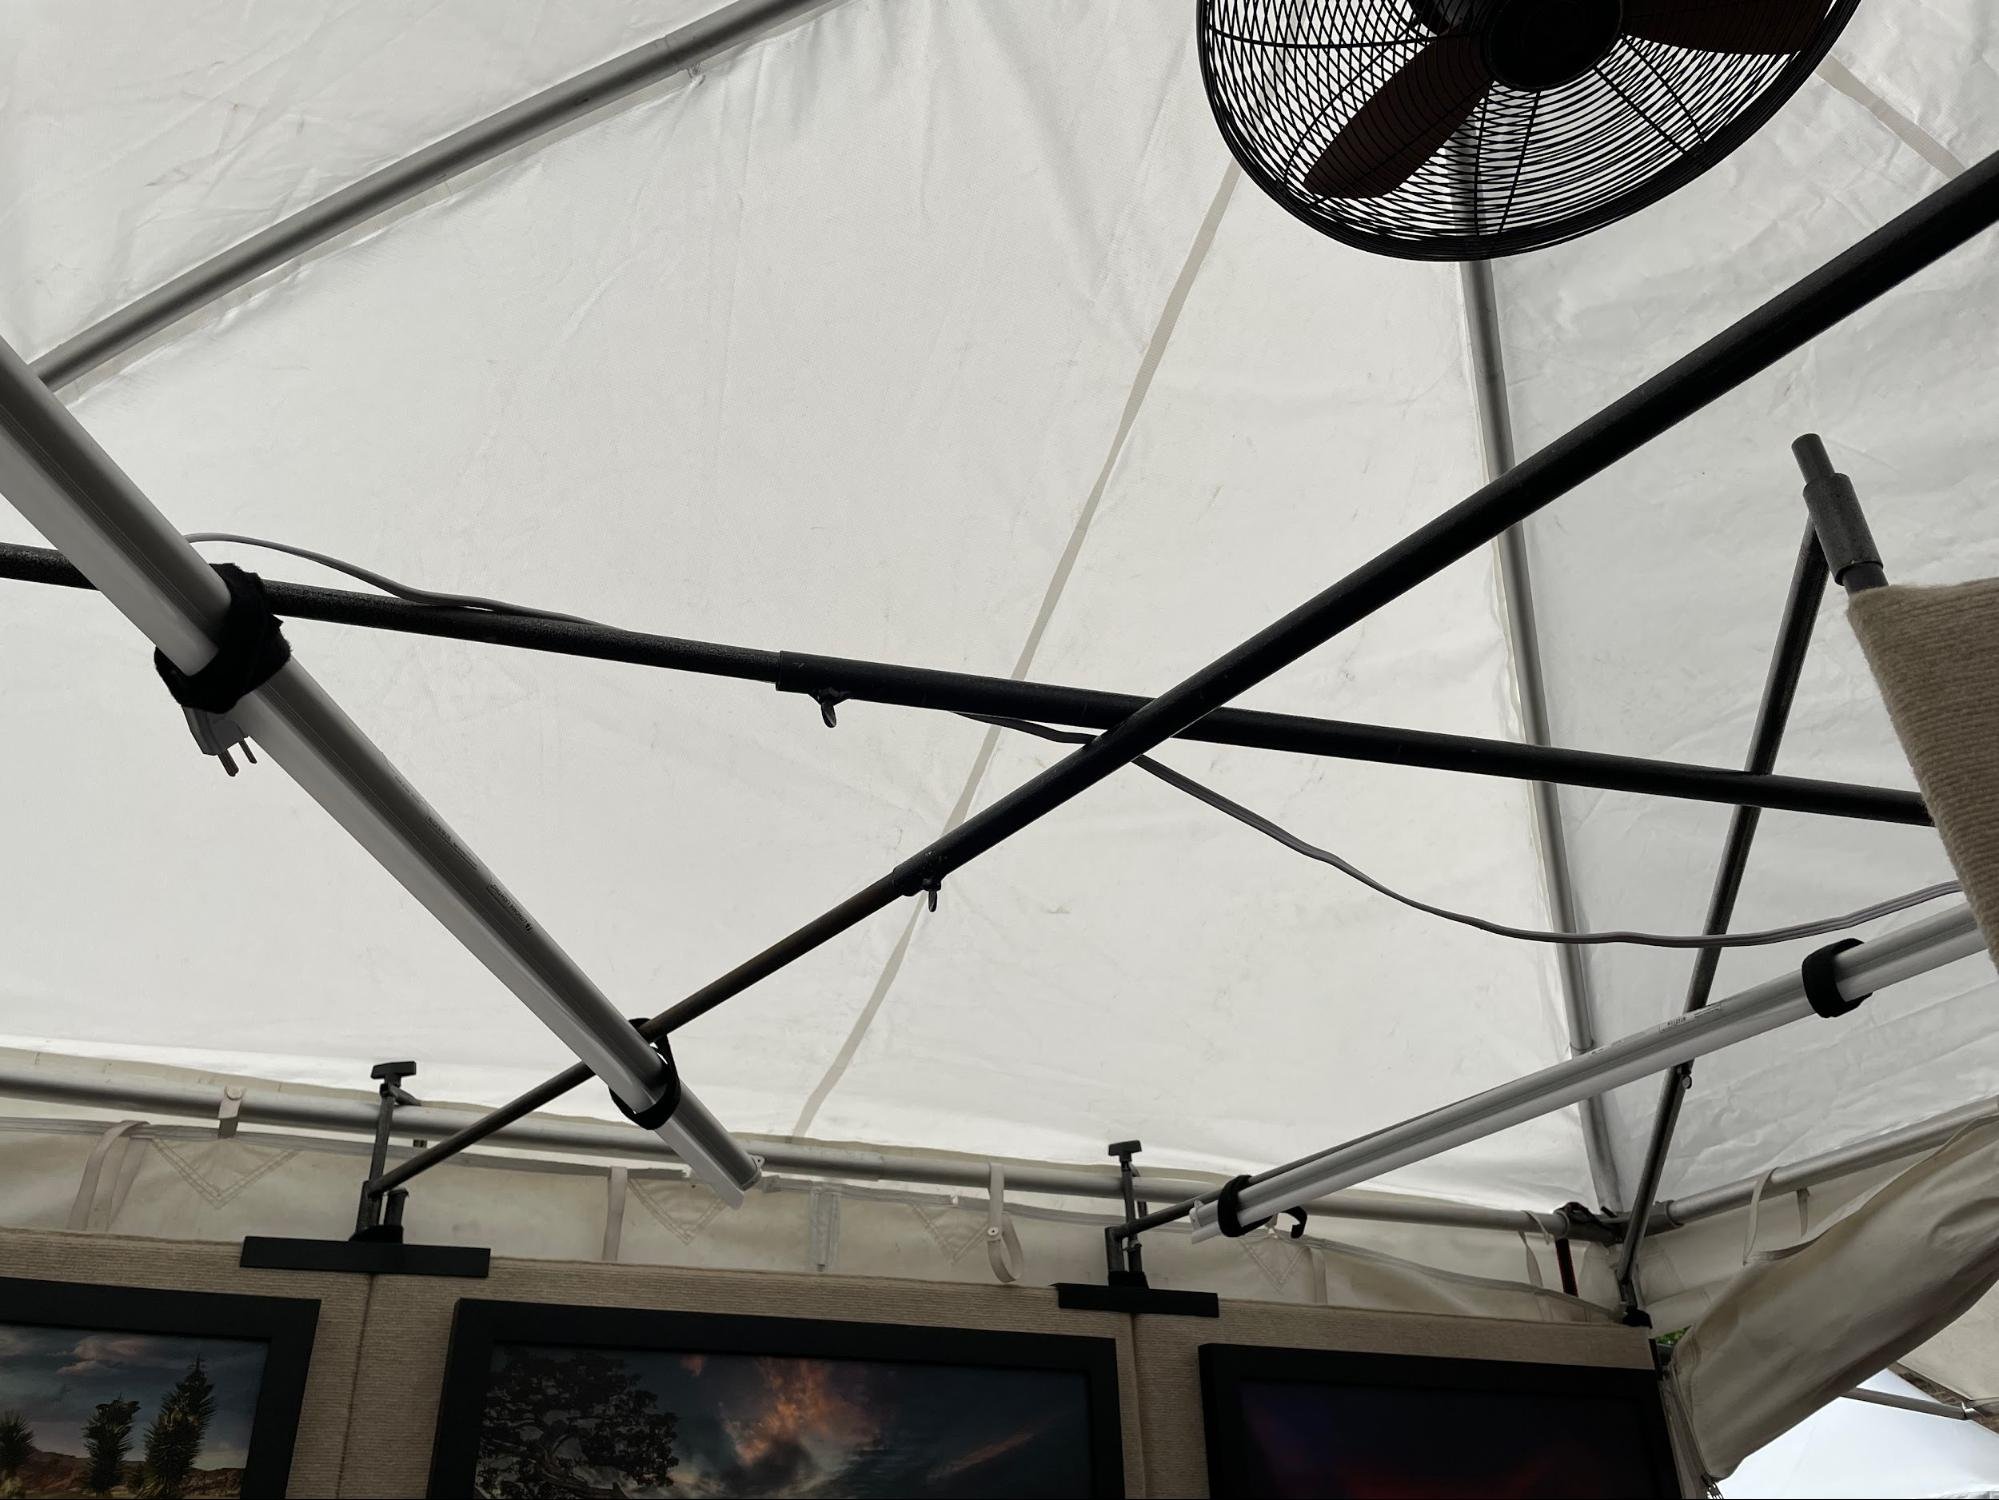
My working knowledge of engineering says to build triangles: So, when installing the large support bars, make them criss-cross. Use two short bars (30”) to connect the back corners. No matter which direction the wind comes from, each wall will brace itself with the neighboring walls, making the booth a stocky little fortress.
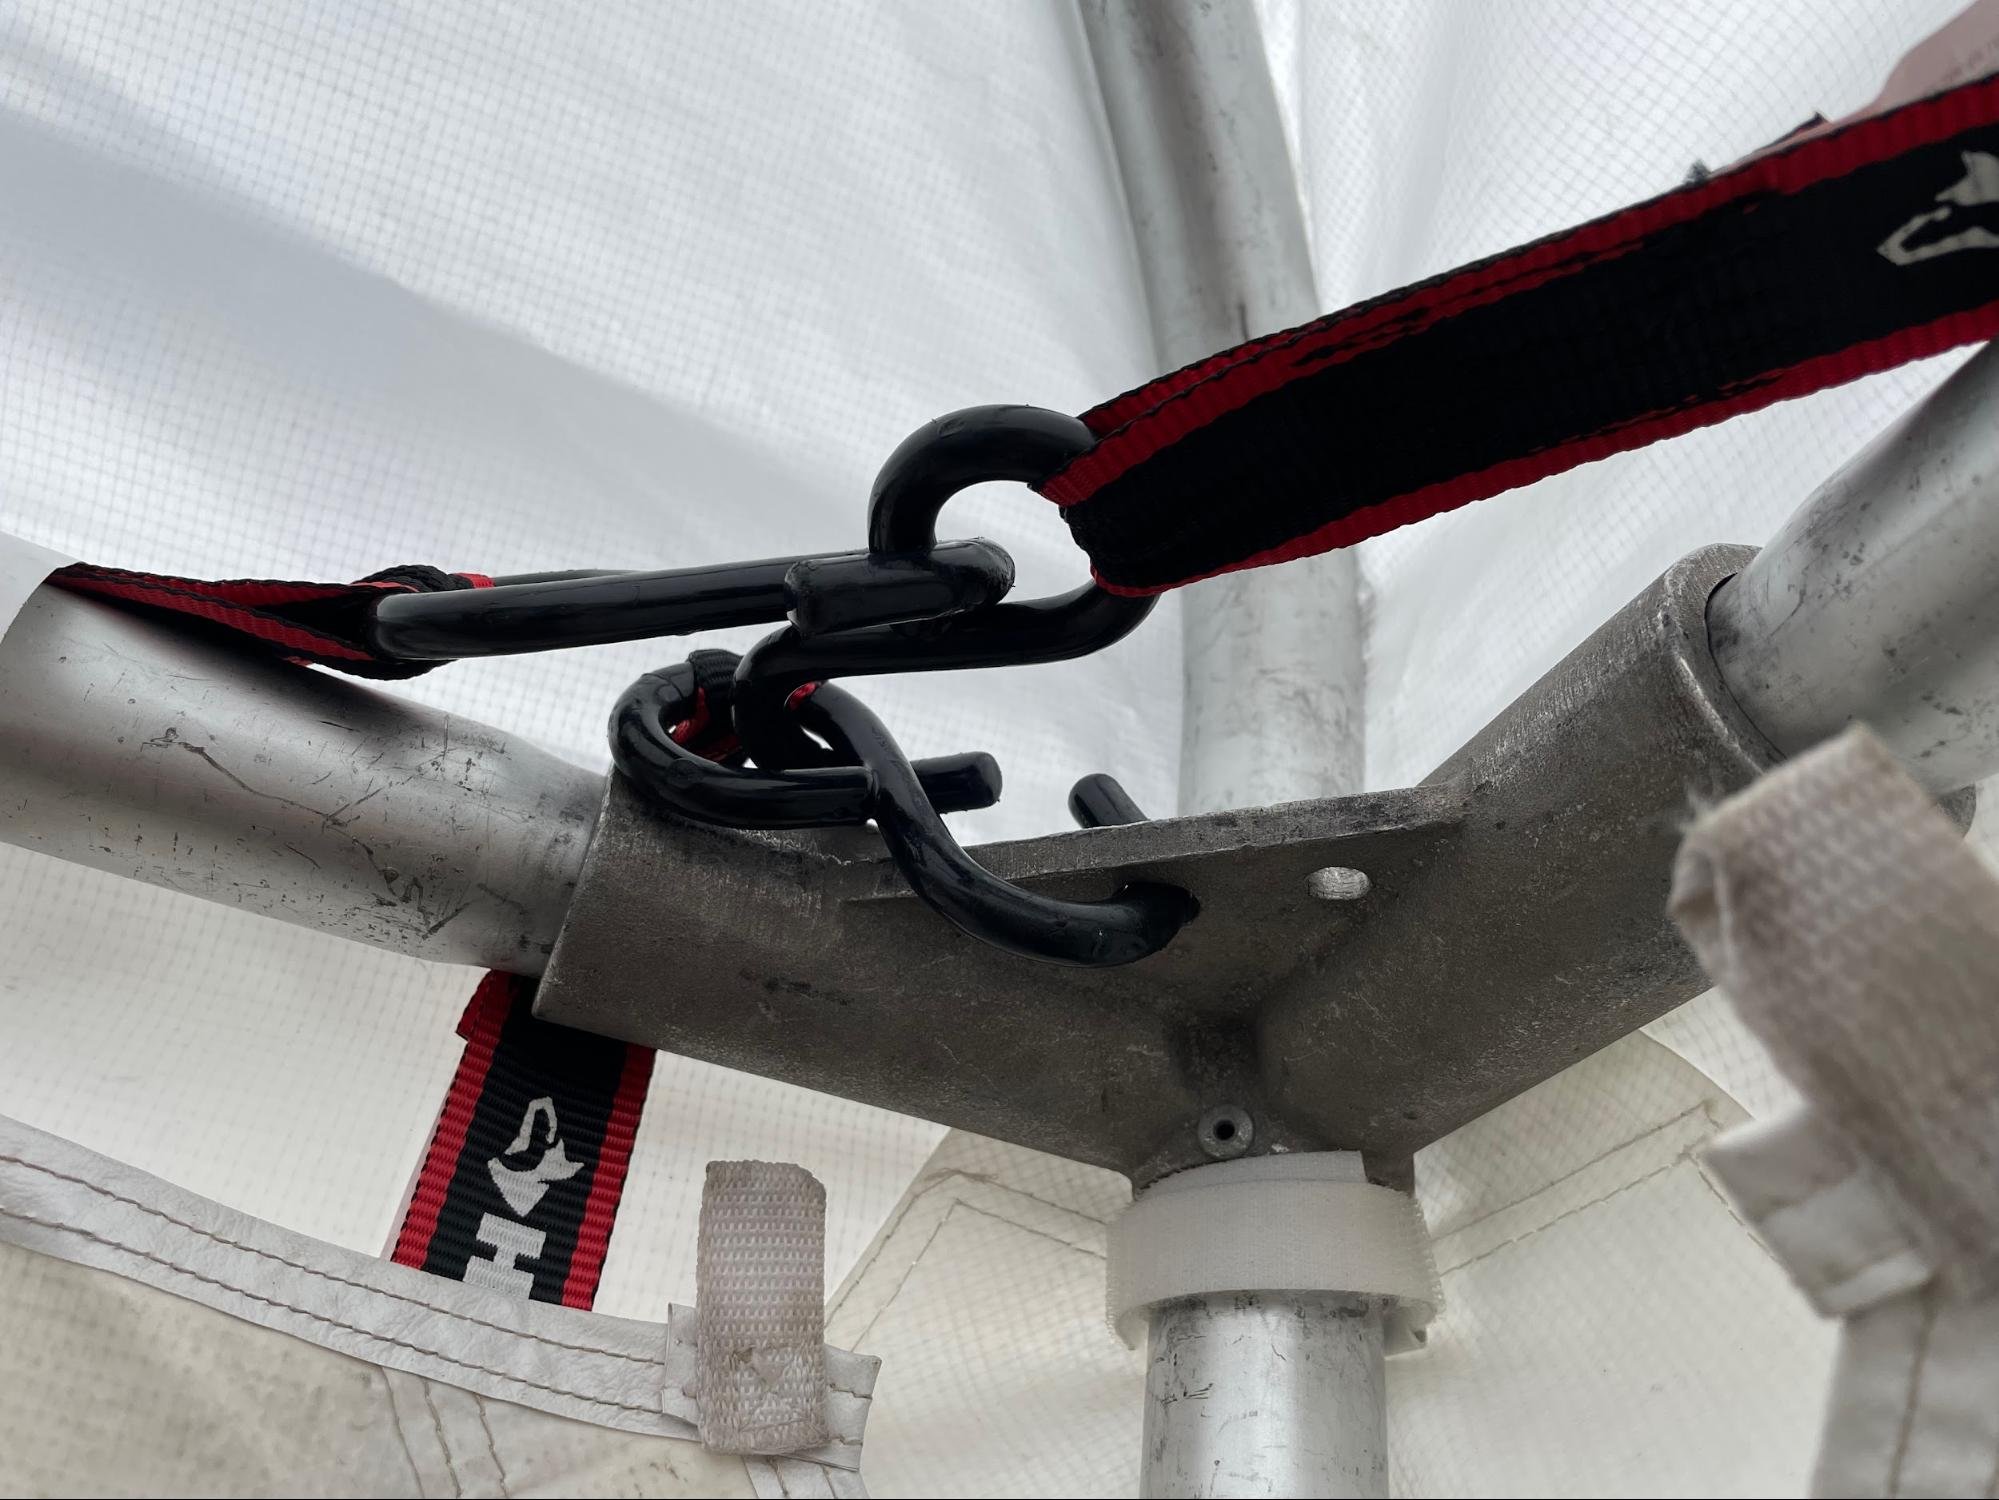
For extra stability: Use tightening cables, rope, or ratcheting straps to connect opposite corners of the tent. Make a criss-cross pattern along the walls, and even across the ceiling.
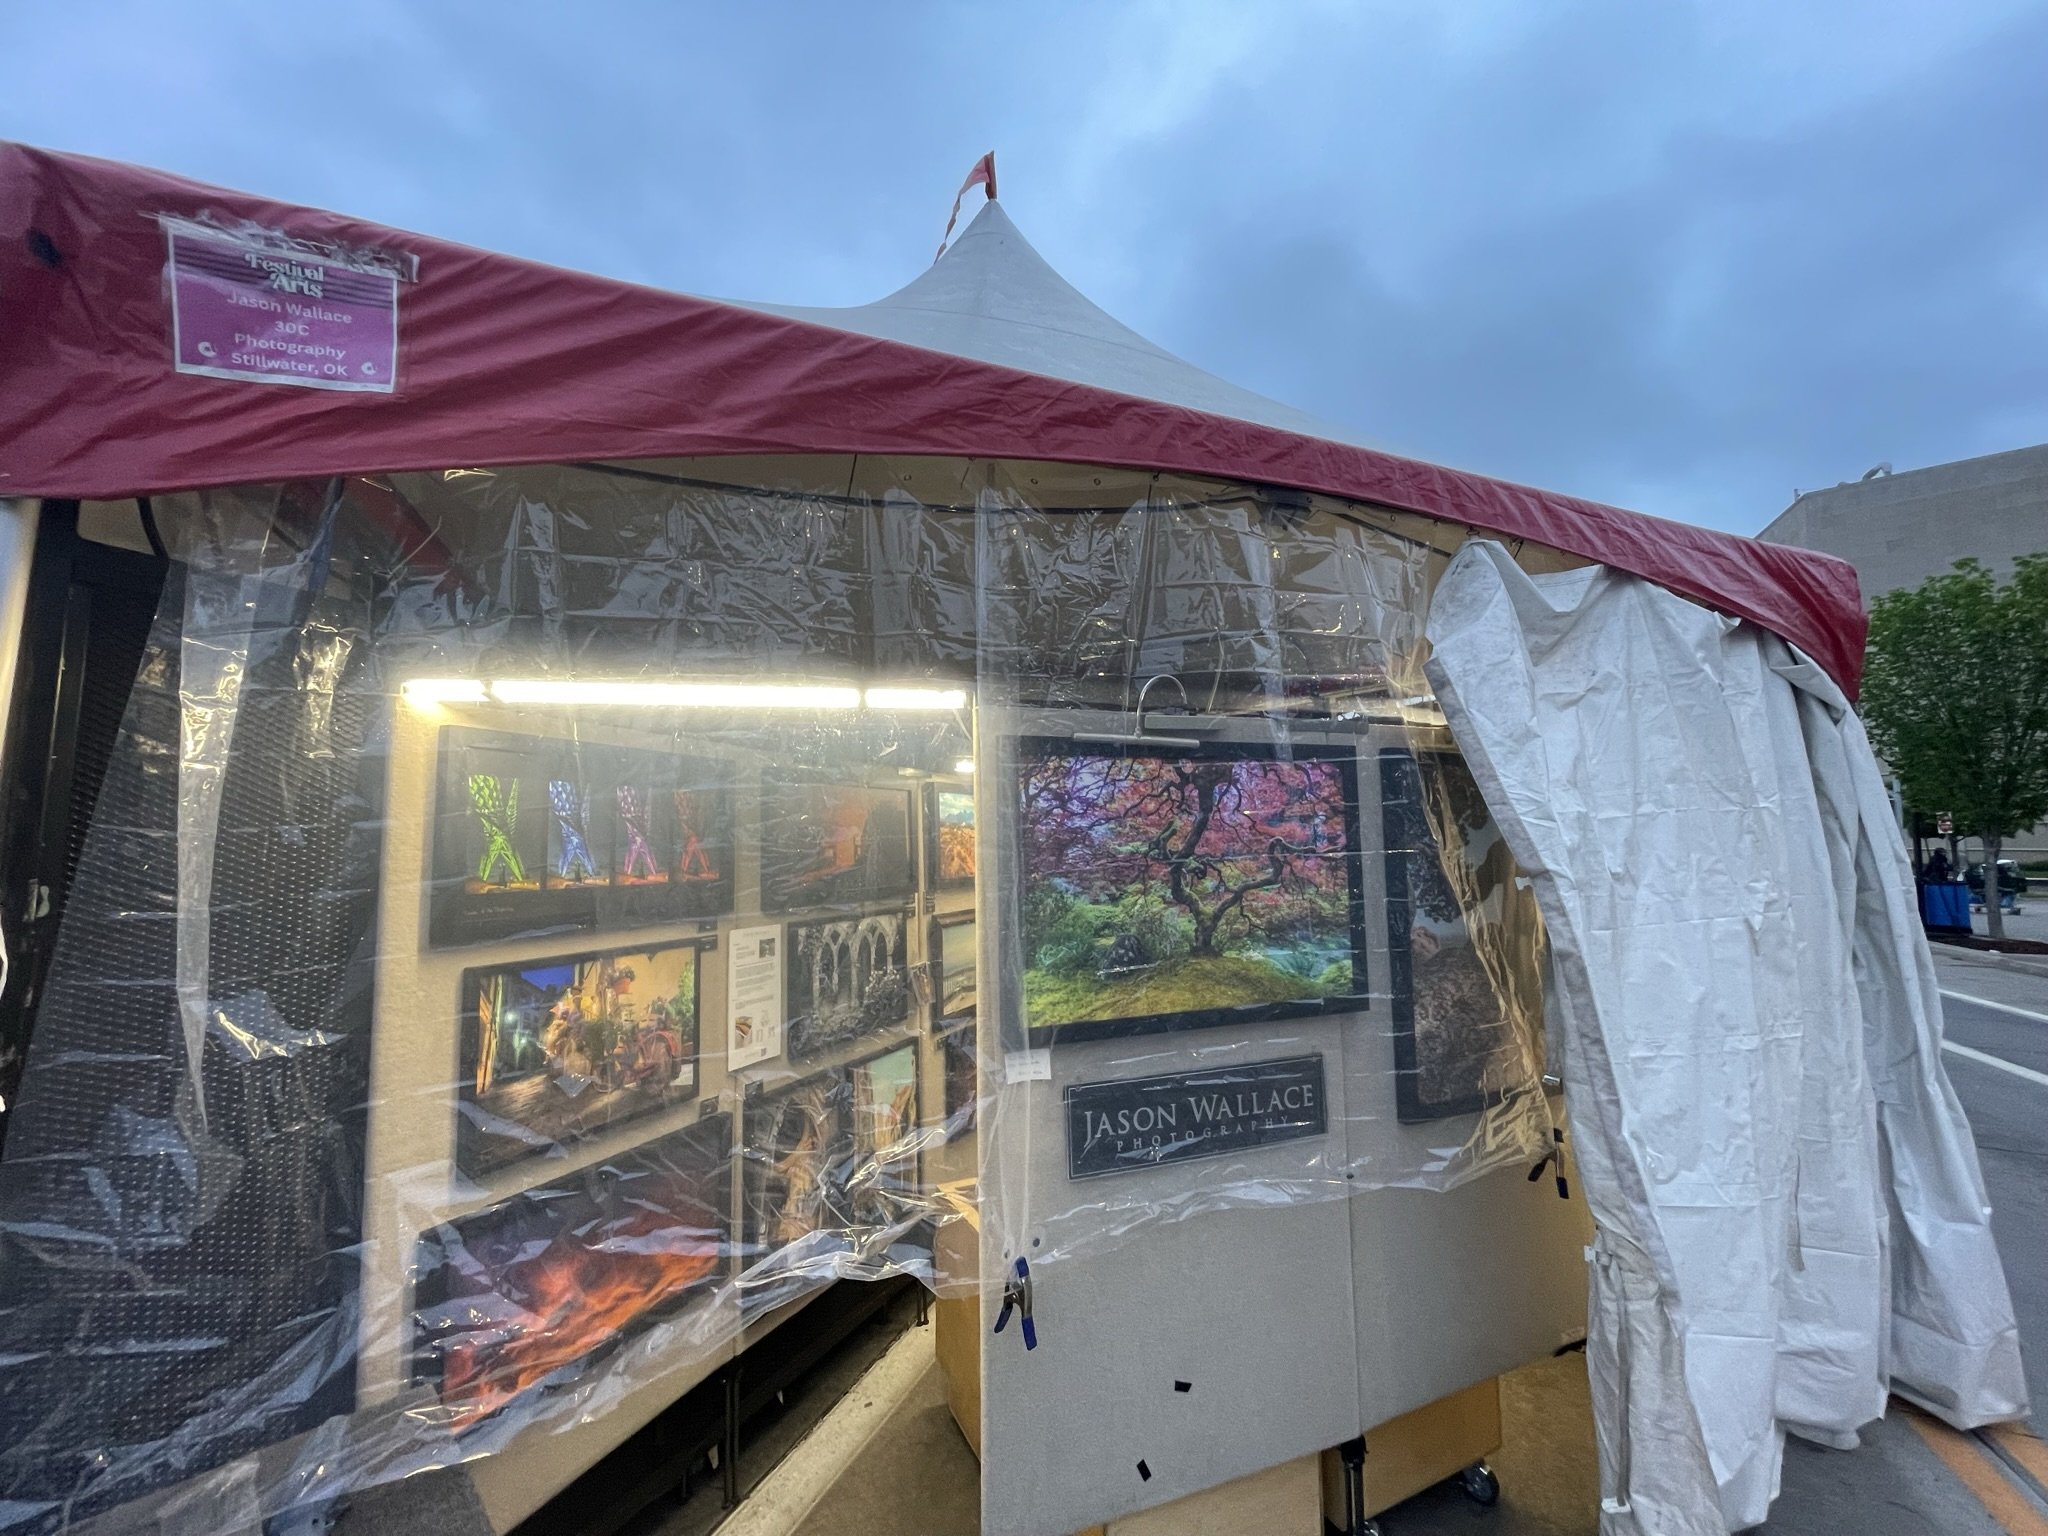
What if it rains?
The tent will come with heavy tarp / vinyl for the roof and to cover the sides. If it starts raining, make sure the sides are down. If it rains during a show, expect the crowd to either disperse, or take shelter in booths for a moment.
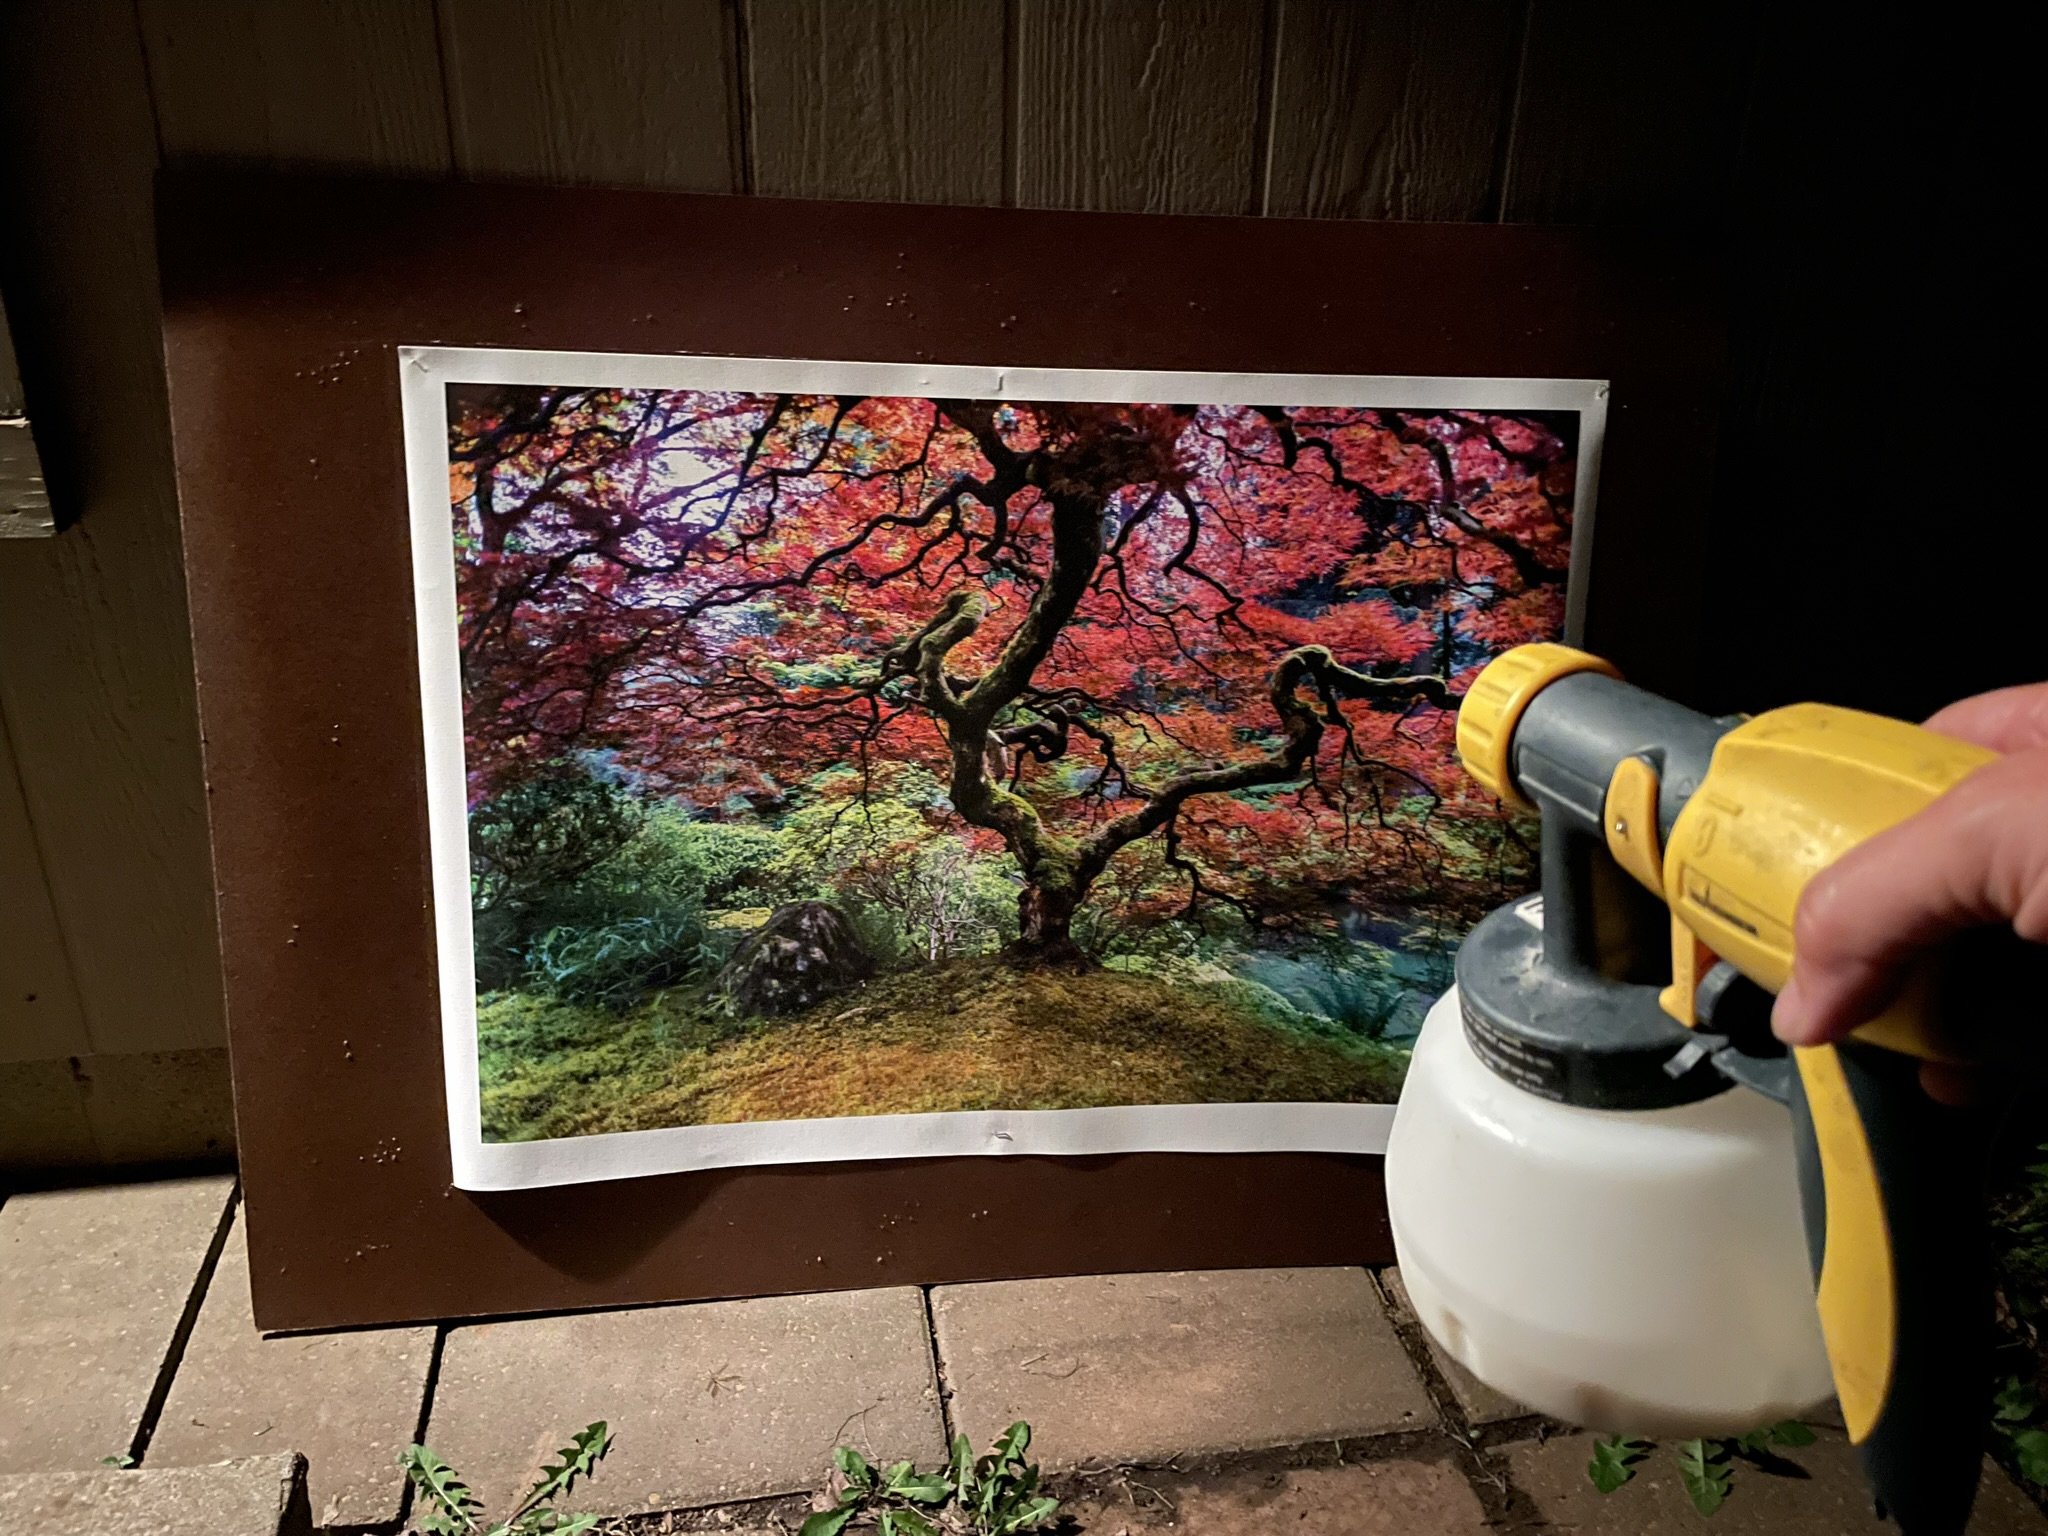
If you want to keep your booth visible to those braving the rain (and have enough warning about the weather), use clear shower curtains to cover your art. Shower curtains work well because they come with grommets for hanging. Some artists hang them directly in front of the art, others hang them at the front of the booth, so visitors open the curtain to get inside.
I mention all of this because I’ve had my booth get hit by countless storms. One was an intense storm with 70 mph winds. I spent the night rehearsing the phone call to my insurance company. Here’s a short video of what I encountered the next morning: https://youtu.be/ARteCbNhH8o

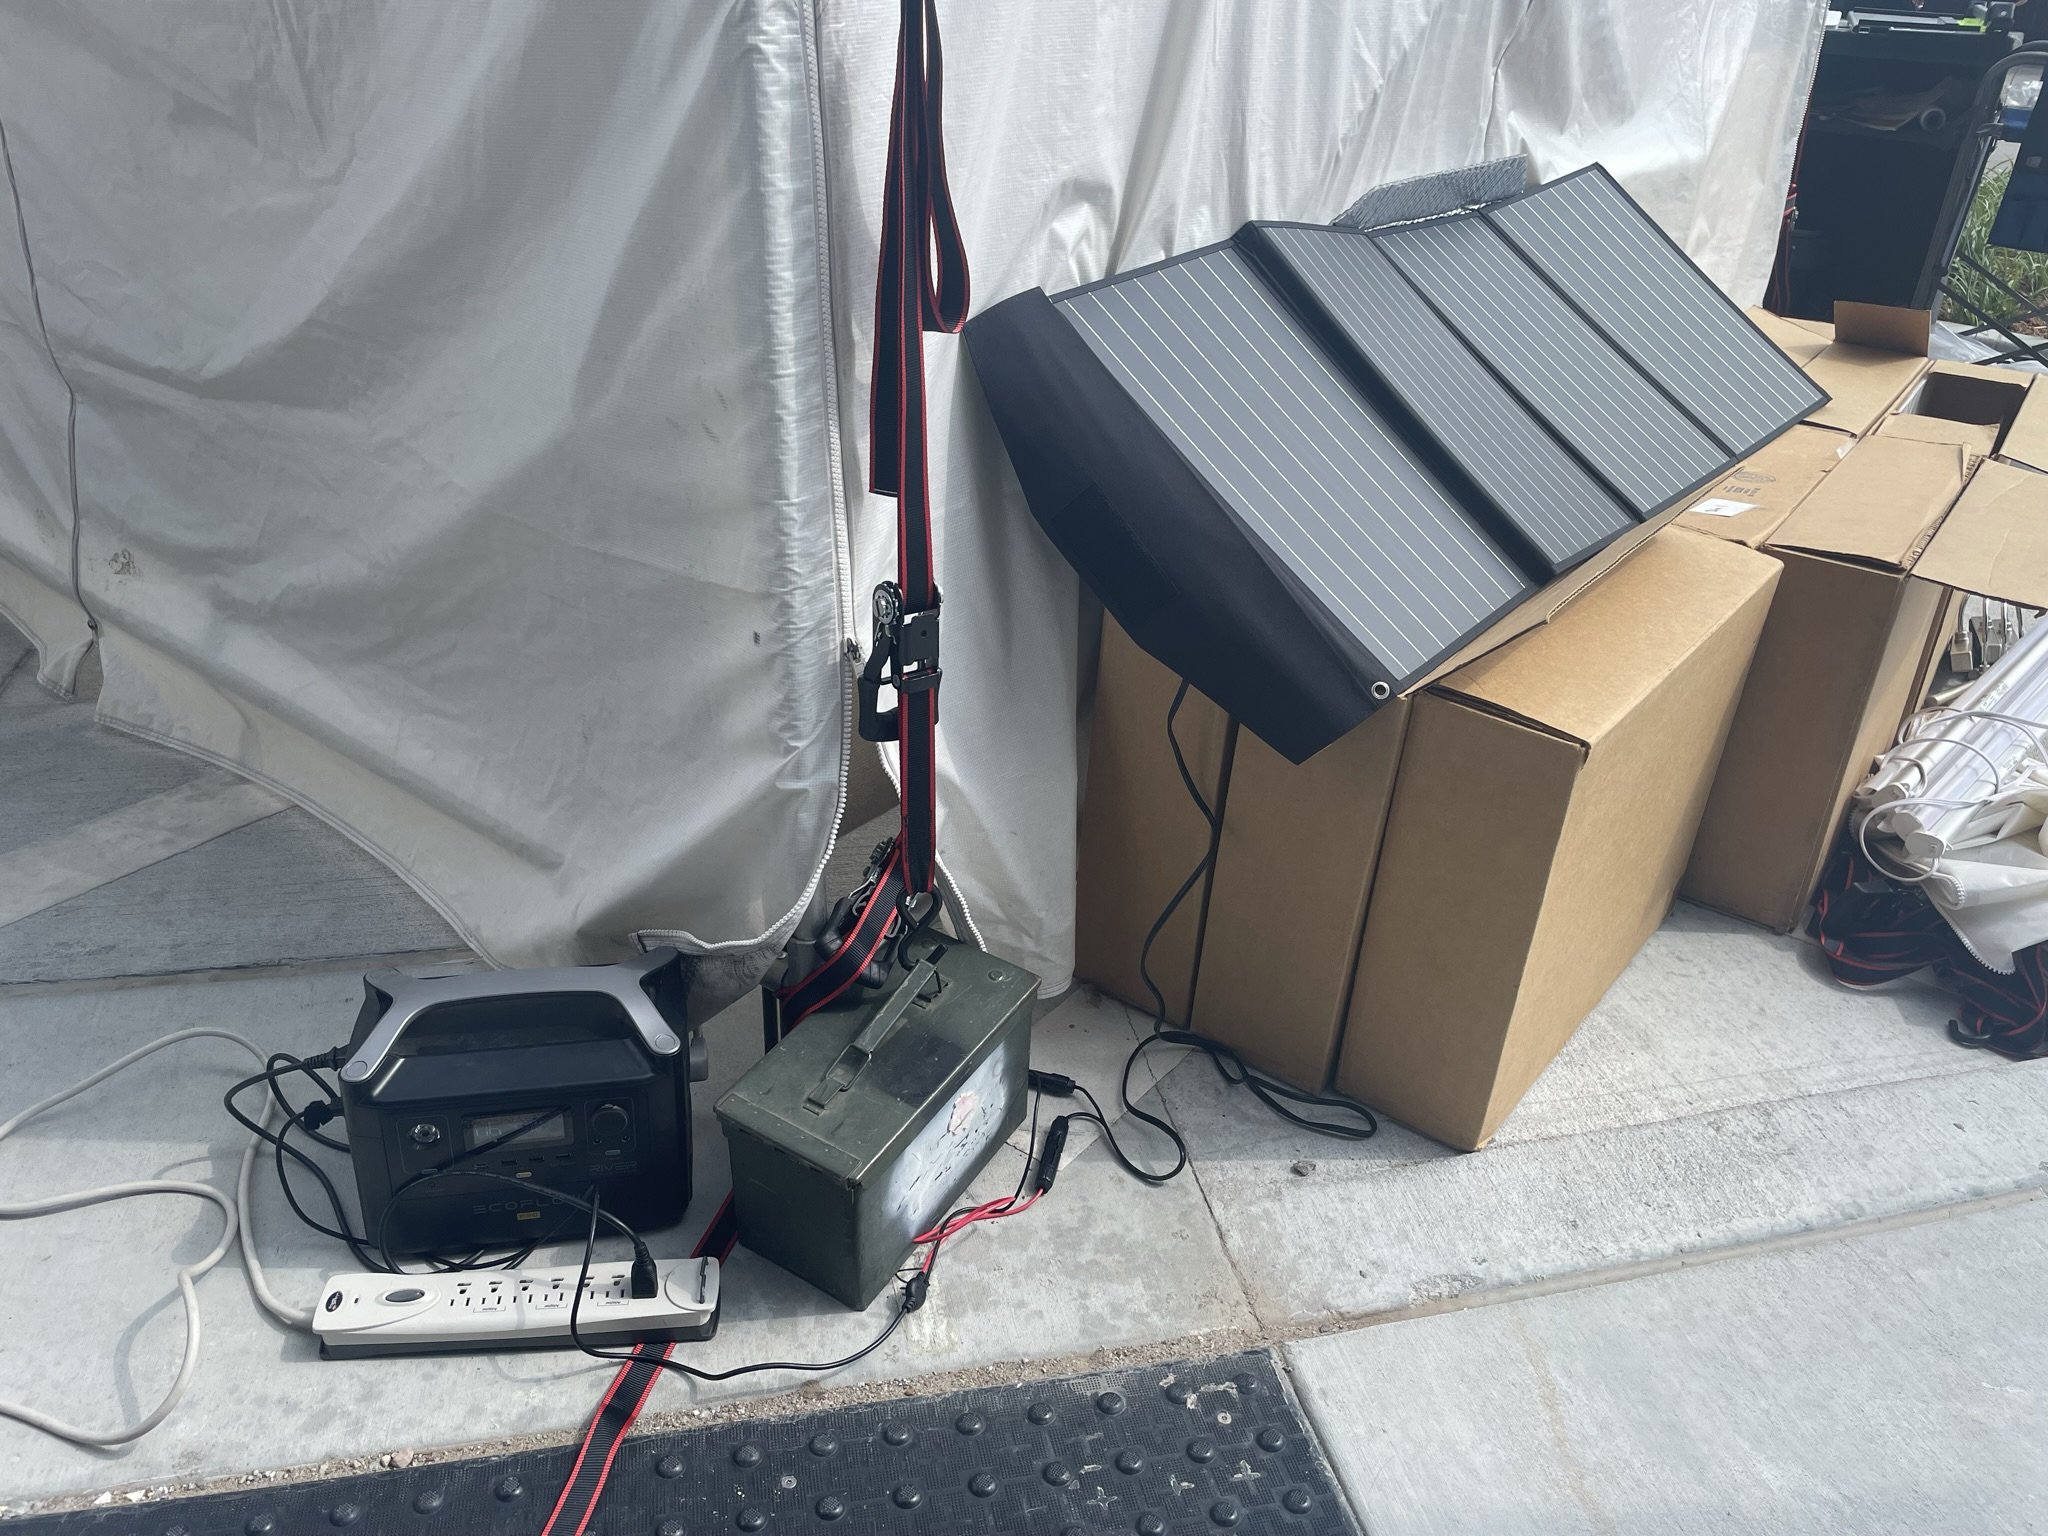
One show happened to have space for a solar panel!
Electricity
You might need lights, a fan, and a way to charge your gadgets.
Some shows offer electricity, most do not. Some shows go after dark. The weather can get hot, and a fan is a good way to keep air flowing in your booth.
Camping/RV batteries are great for this!
These allow you to use traditional household items that use a two or three prong plug.
Most of those units support solar panels for charging. Even though the layout of most shows don't have much space around the booths to allow for solar panels, find a way to be creative! (The roof of the tent may be an option. Would love to hear your thoughts on a good solution for this!)
Don't get a gas-powered generator. They're too noisy. Most shows ban them for that reason.
Suggestion: If you have Pro Panels (or a similar carpeted display), get creative with velcro!
I attach my lights with wrapping velcro along the support bars for the ProPanels. I also use a power strip with velcro on the back, stick it on the back of a panel in an area that’s close enough for my lights to reach, then run it to my battery.

Let there be 4-ft LED shop lights held up with wrapping velcro, plugged into an extension cord, and then light!
Lights
LED changed the world! String lights, camping lights, fairy lights, shop lights, track lights – they use a minimal amount of power, and the options are limitless! Look for power options: battery, plug-in, and/or USB rechargeable.
You might not need a big battery if all you use are lights that have their own power.
Technical note: When a light says “daylight” or more specifically, “5000K” and/or “90+ CRI” these will most accurately display the color of your work. Sure, a warm light feels cozy, and I agree they bring a comfort to the day, using them to show art will add a colored tint. There’s some human physiology at work: the perception of colors can be altered under different kelvin and CRI of light, even though your eyes are doing their best to auto-adjust. Here’s an insightful two minute video by color theory educator Peter Donahue who explores it.
That said, LED is the way to go, no matter if you want white or colored light!
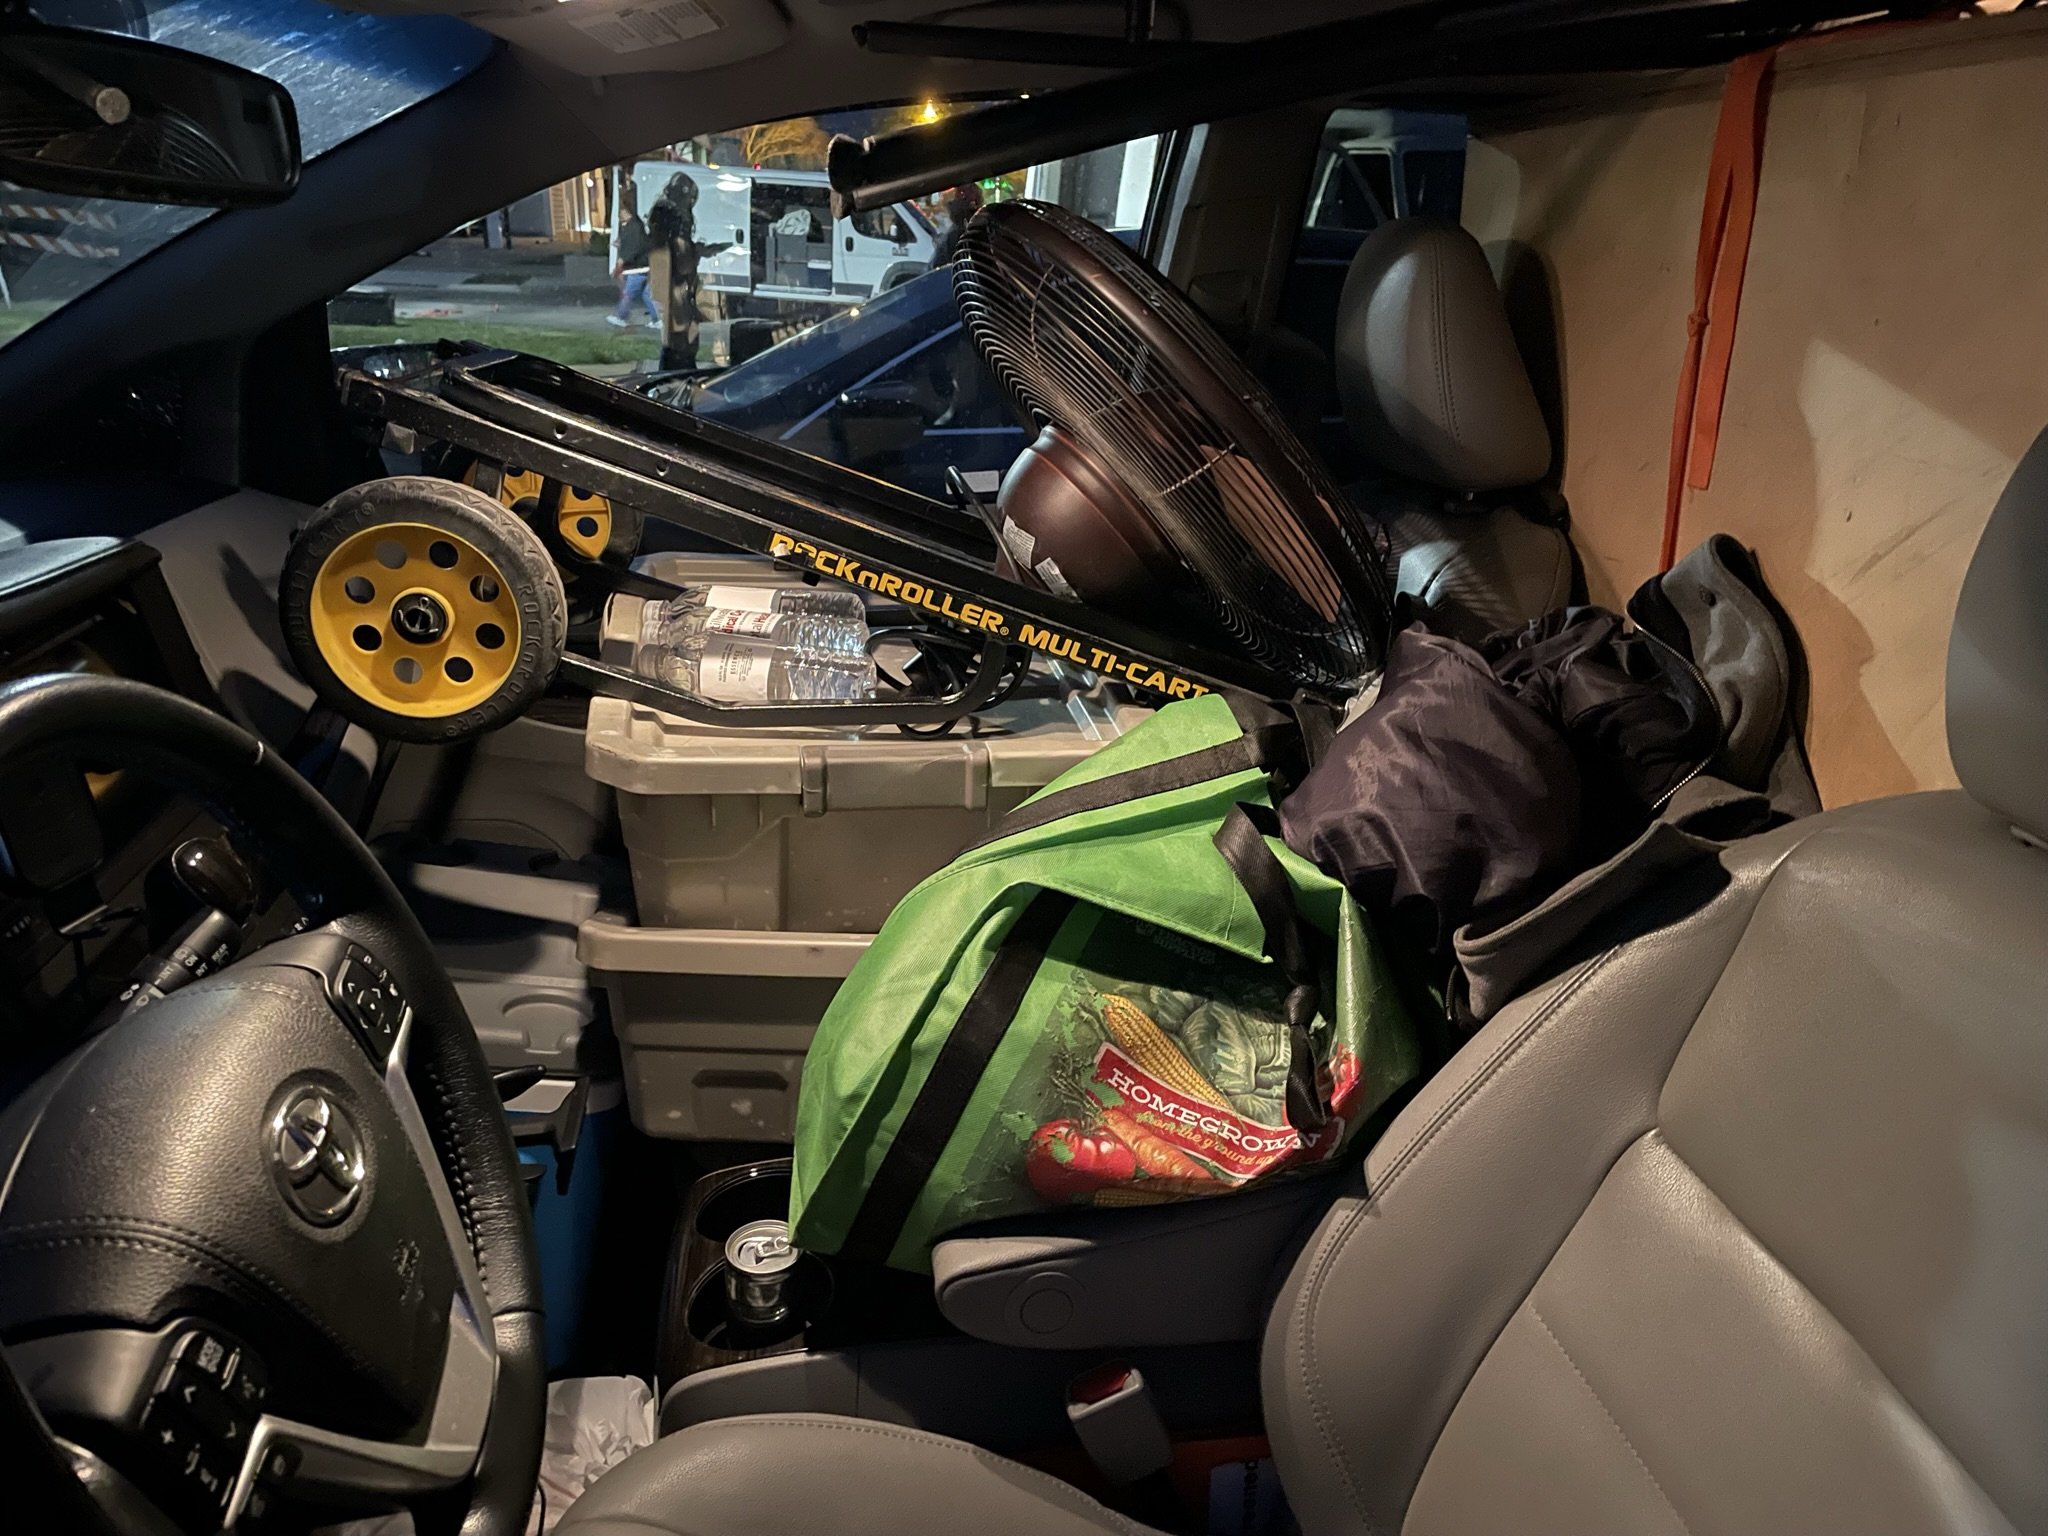
How do you carry everything?
It helps if you’ve logged 10,000 hours playing Tetris.
Assess what you need to carry. Generally it’s this:
Tent: poles and fabric
Display: carpeted panels, more poles and other tools that hold them together
Artwork (varies per artist): framed pieces, prints, and the things they’re stored in
Miscellaneous booth things: print bins, chair, desk or podium, fan
Retail supplies: business cards, retail bags, booth signage
Tool box with office supplies, pens, scissors, tape, velcro, hanging wire, screws, touch-up paint, charging cables
Luggage: If you’re traveling to a show and have to stay several days
Cooler: for food and snacks during the show
On your person: a belt pack for storing money, and to hold the little Square card reader
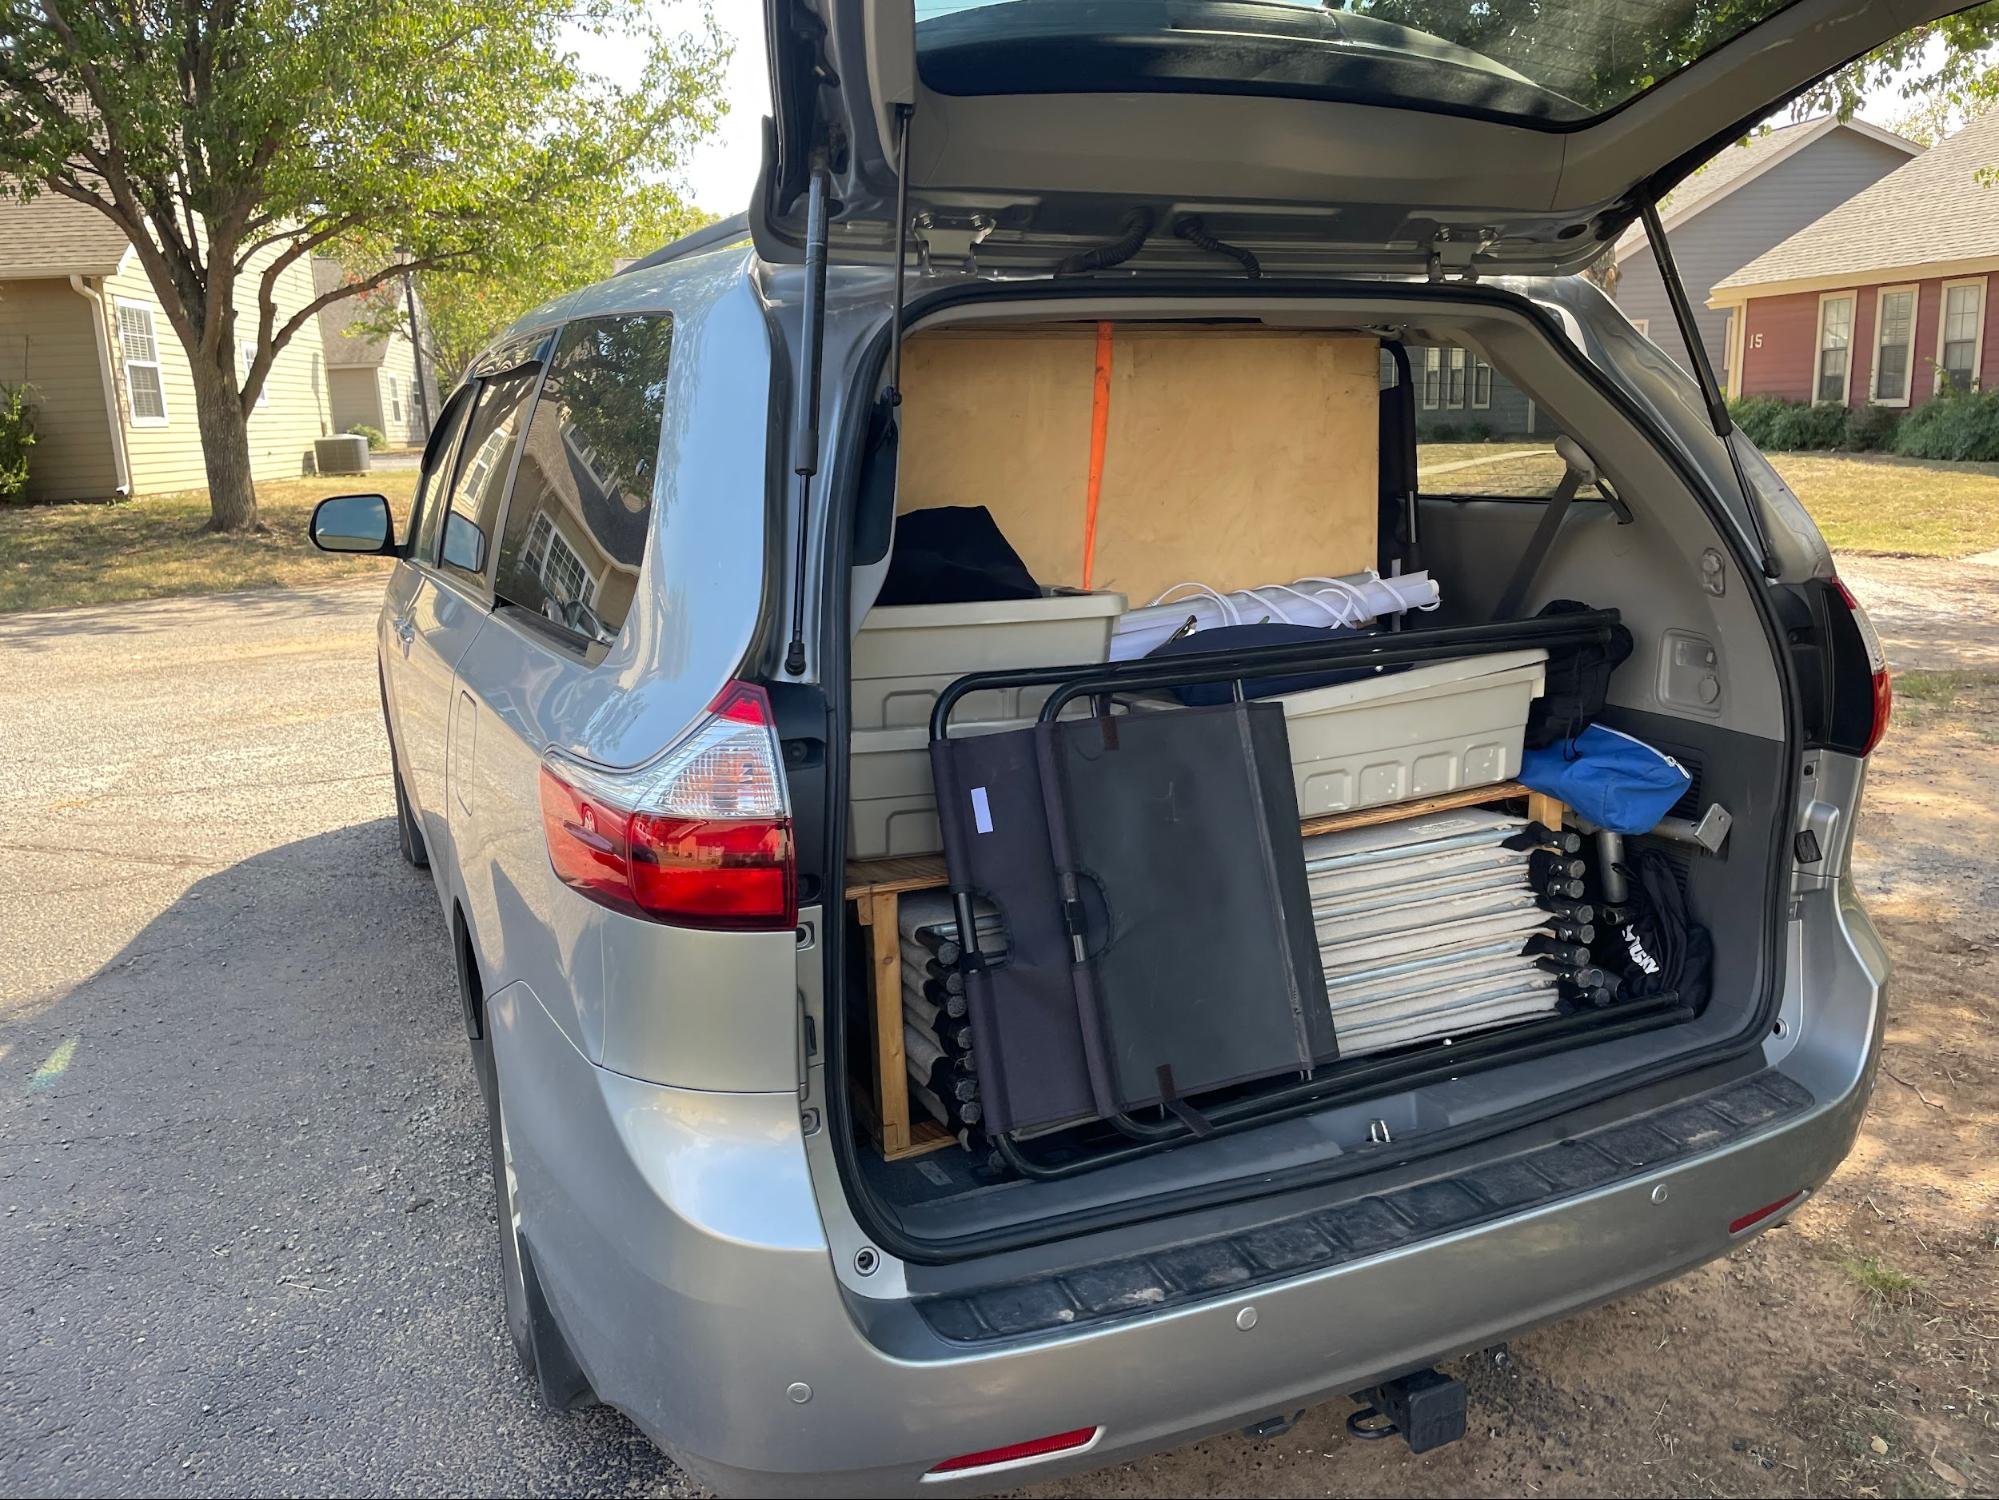
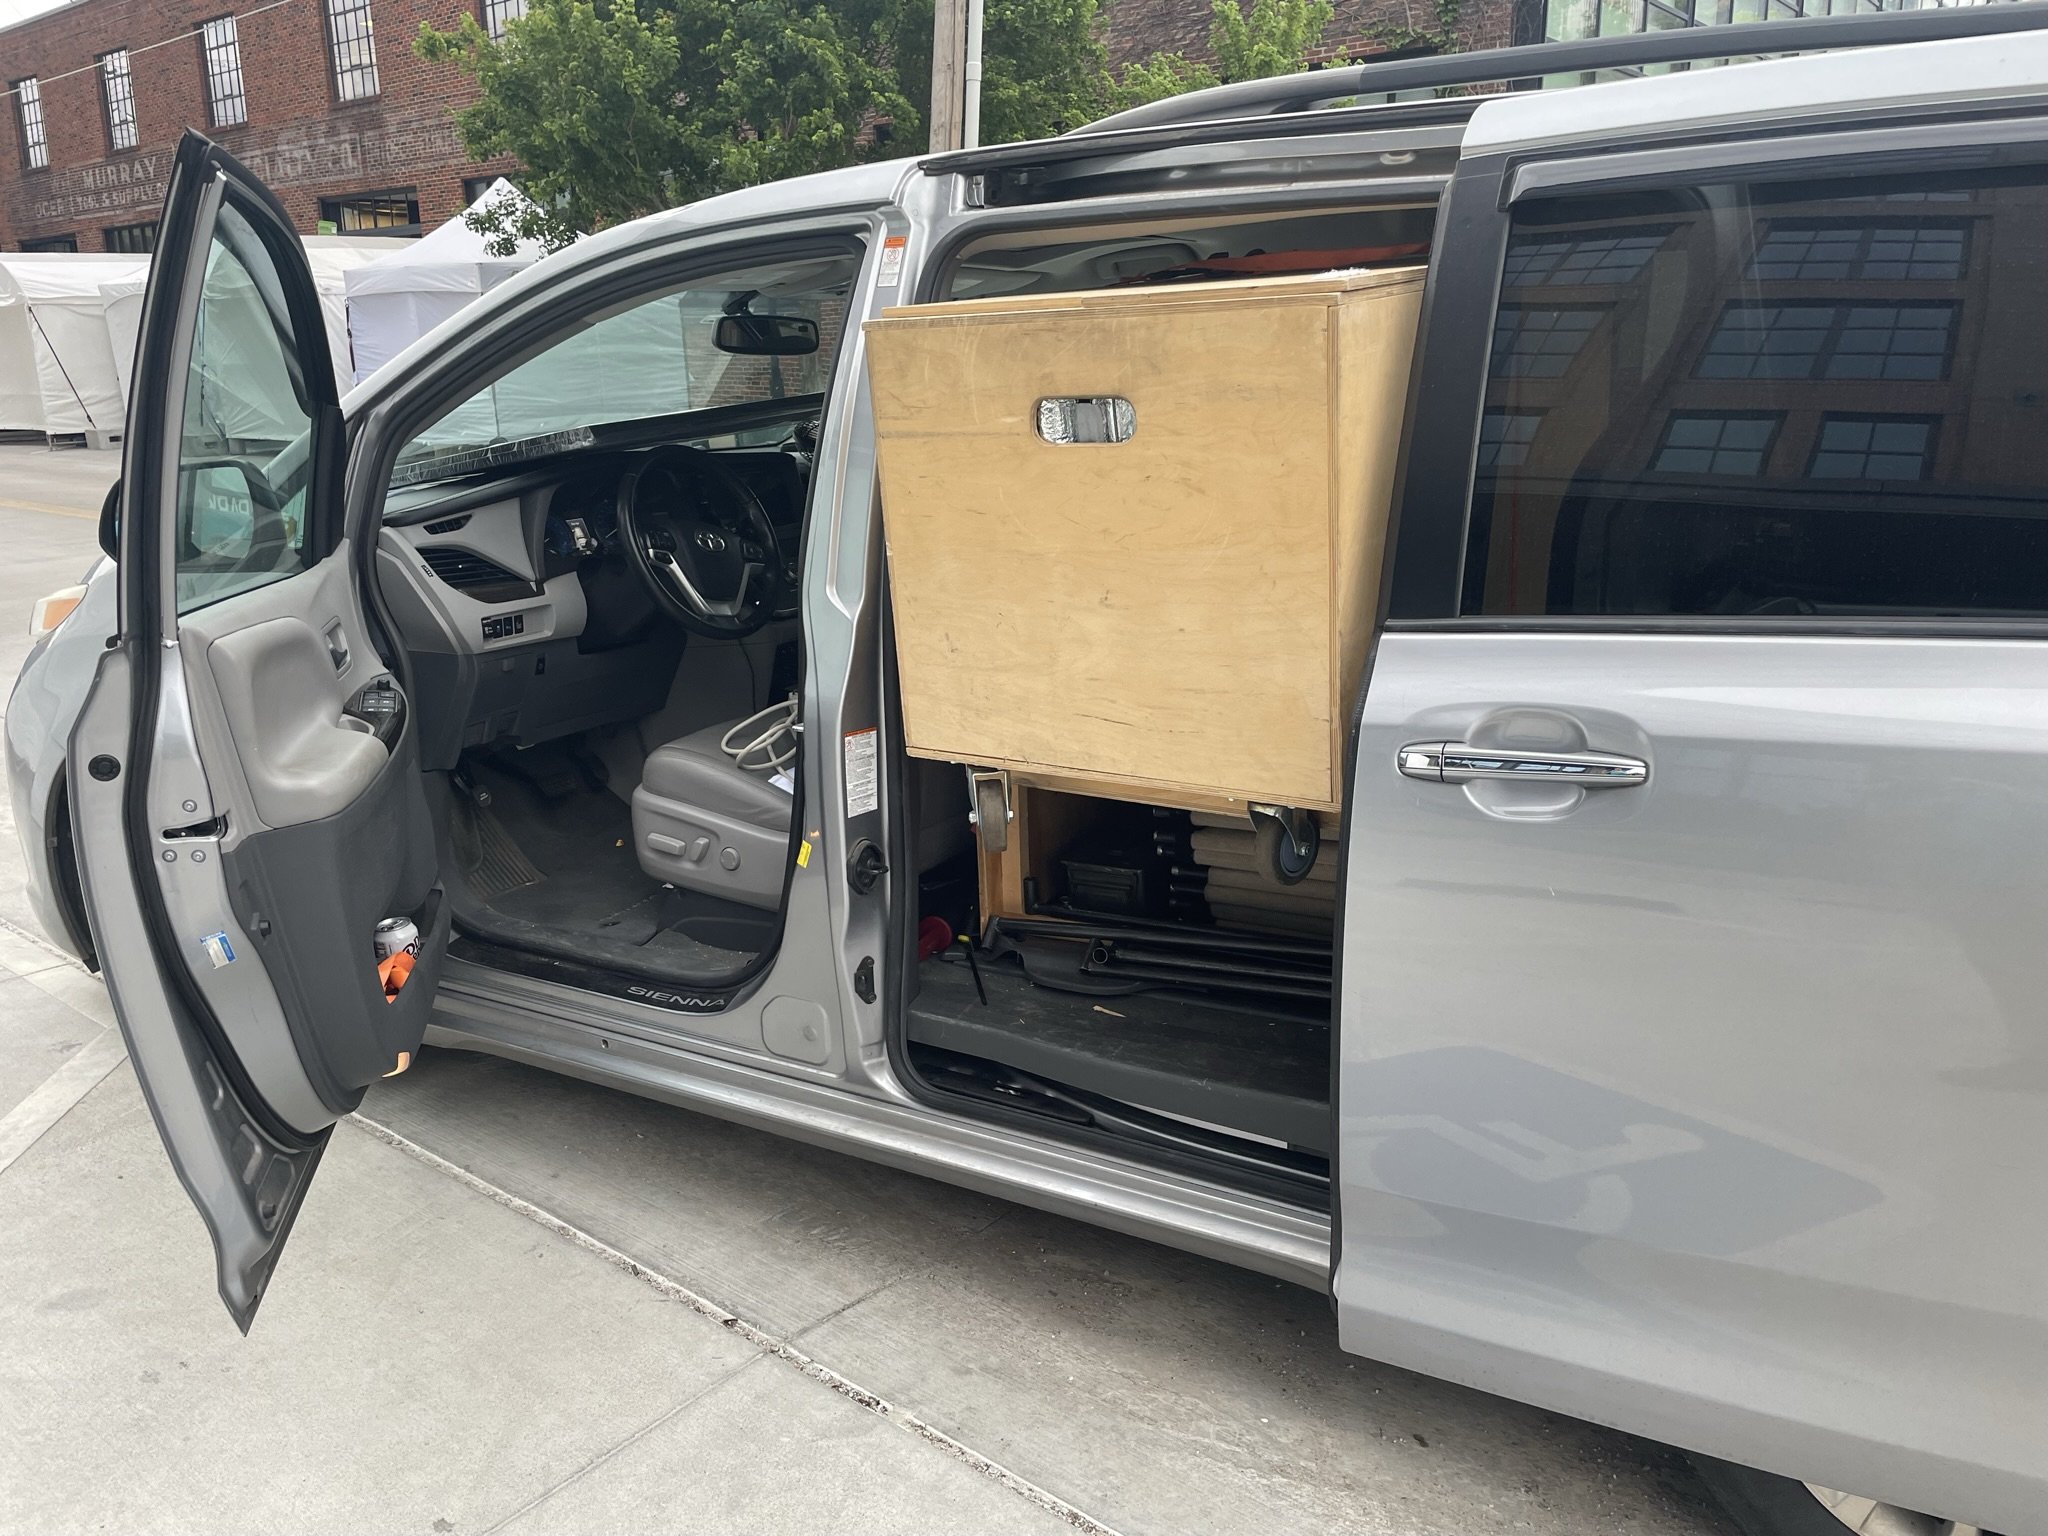
This may sound like a lot, and it is. Before you think of shelling out for a giant cargo van, you would be surprised what you can fit in an SUV or minivan.
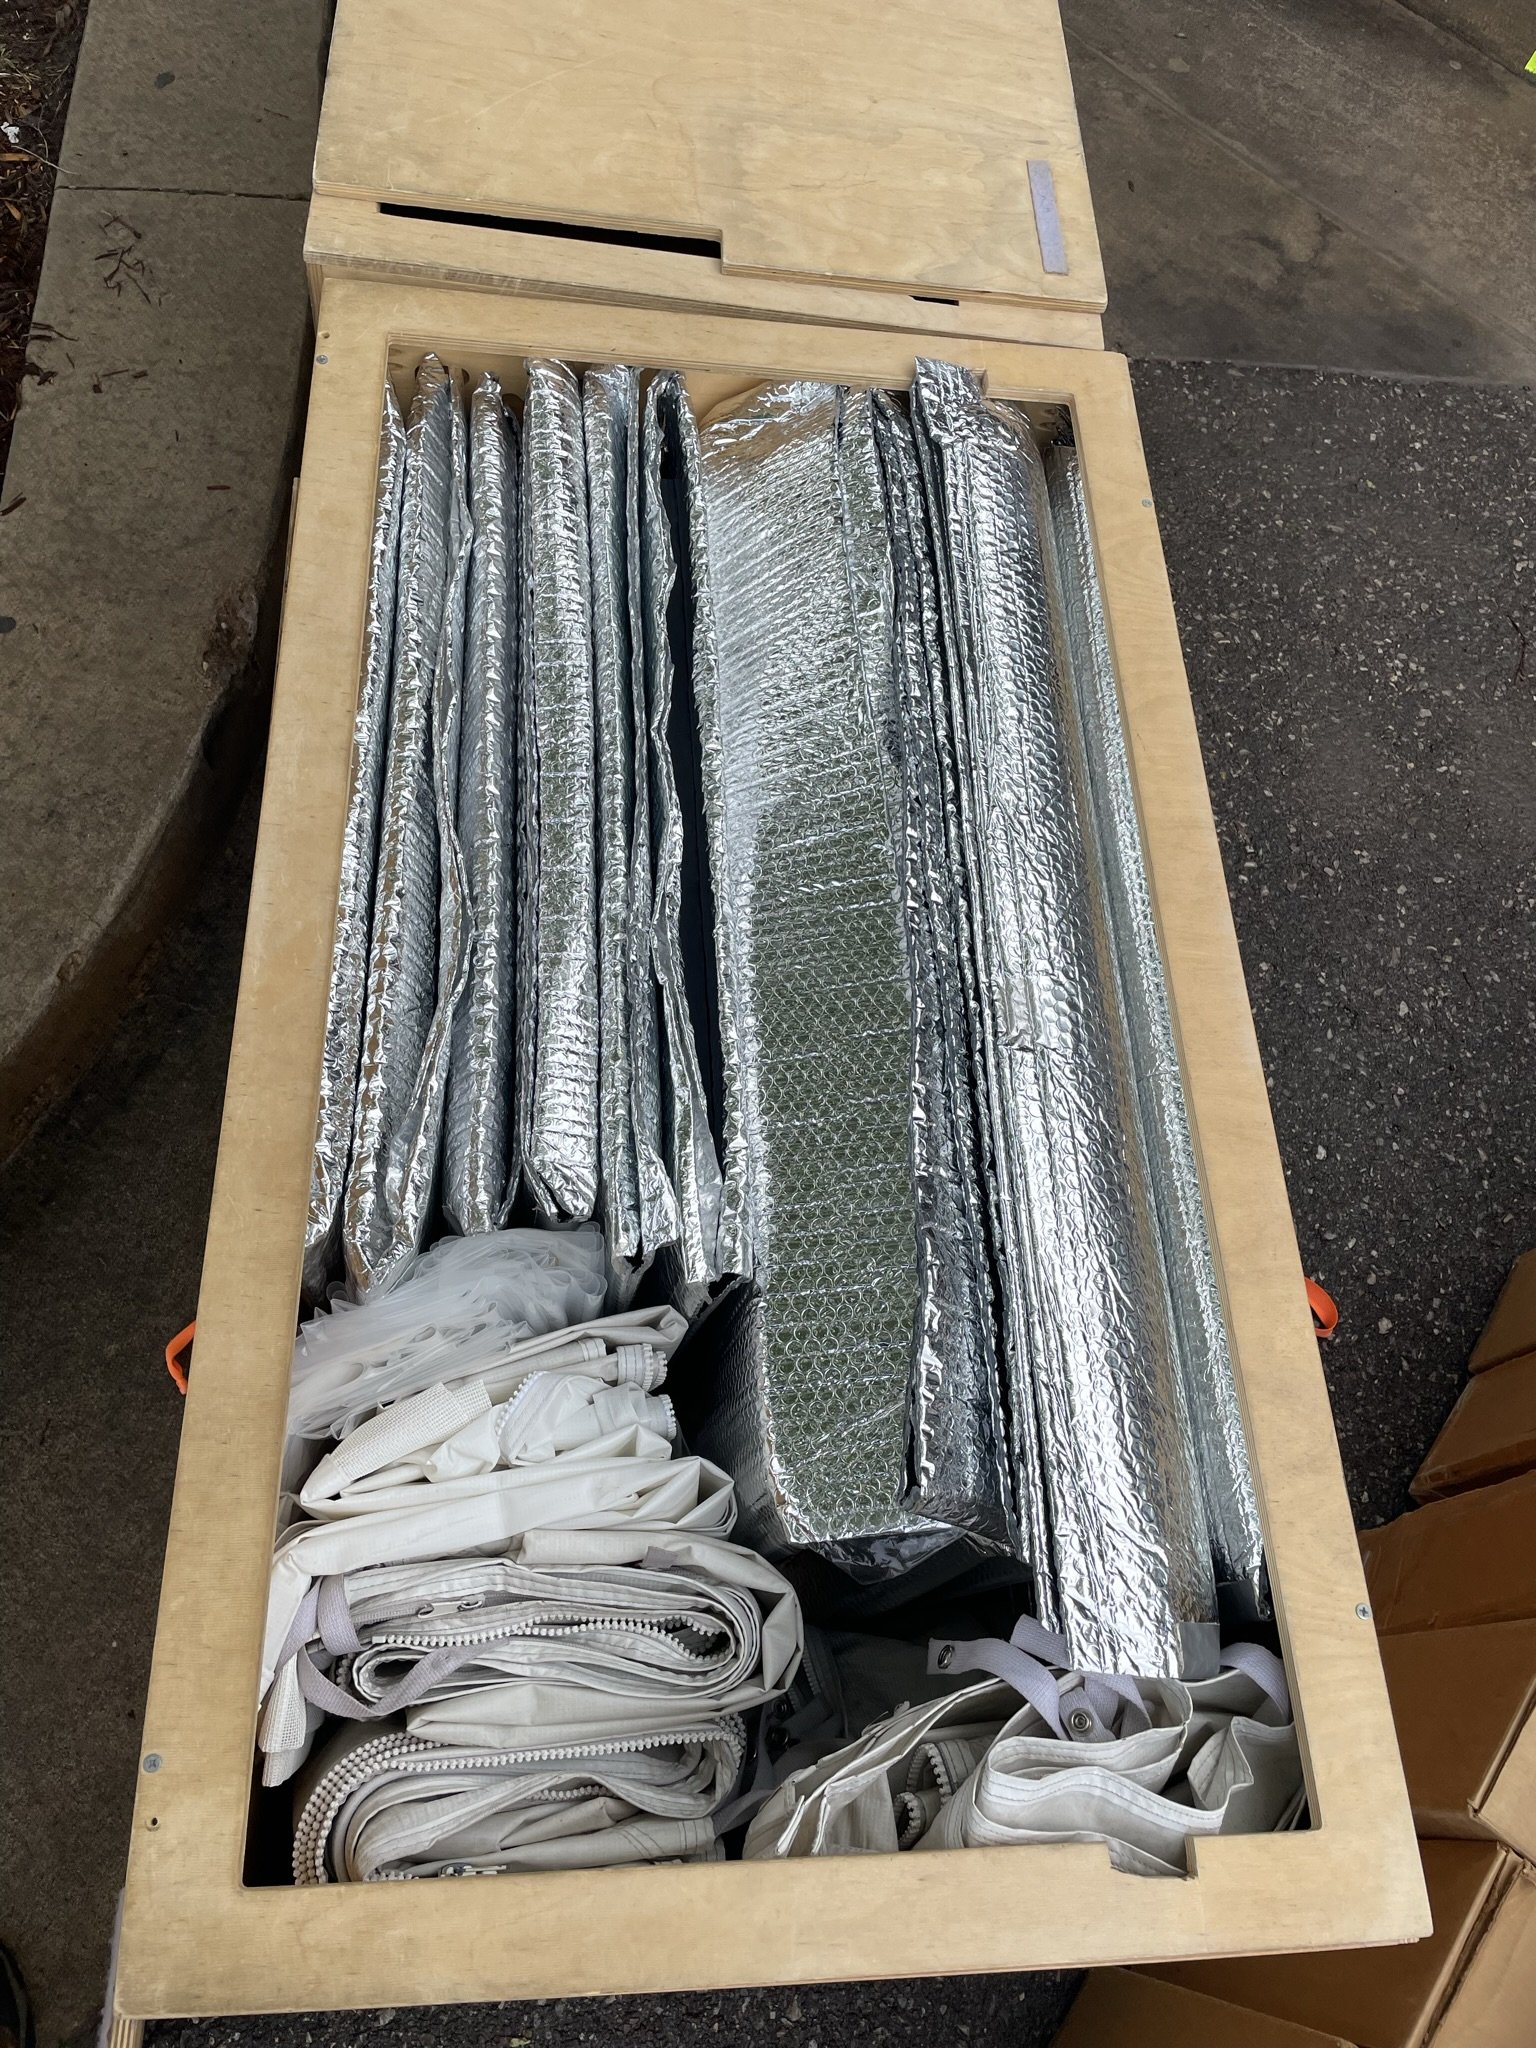
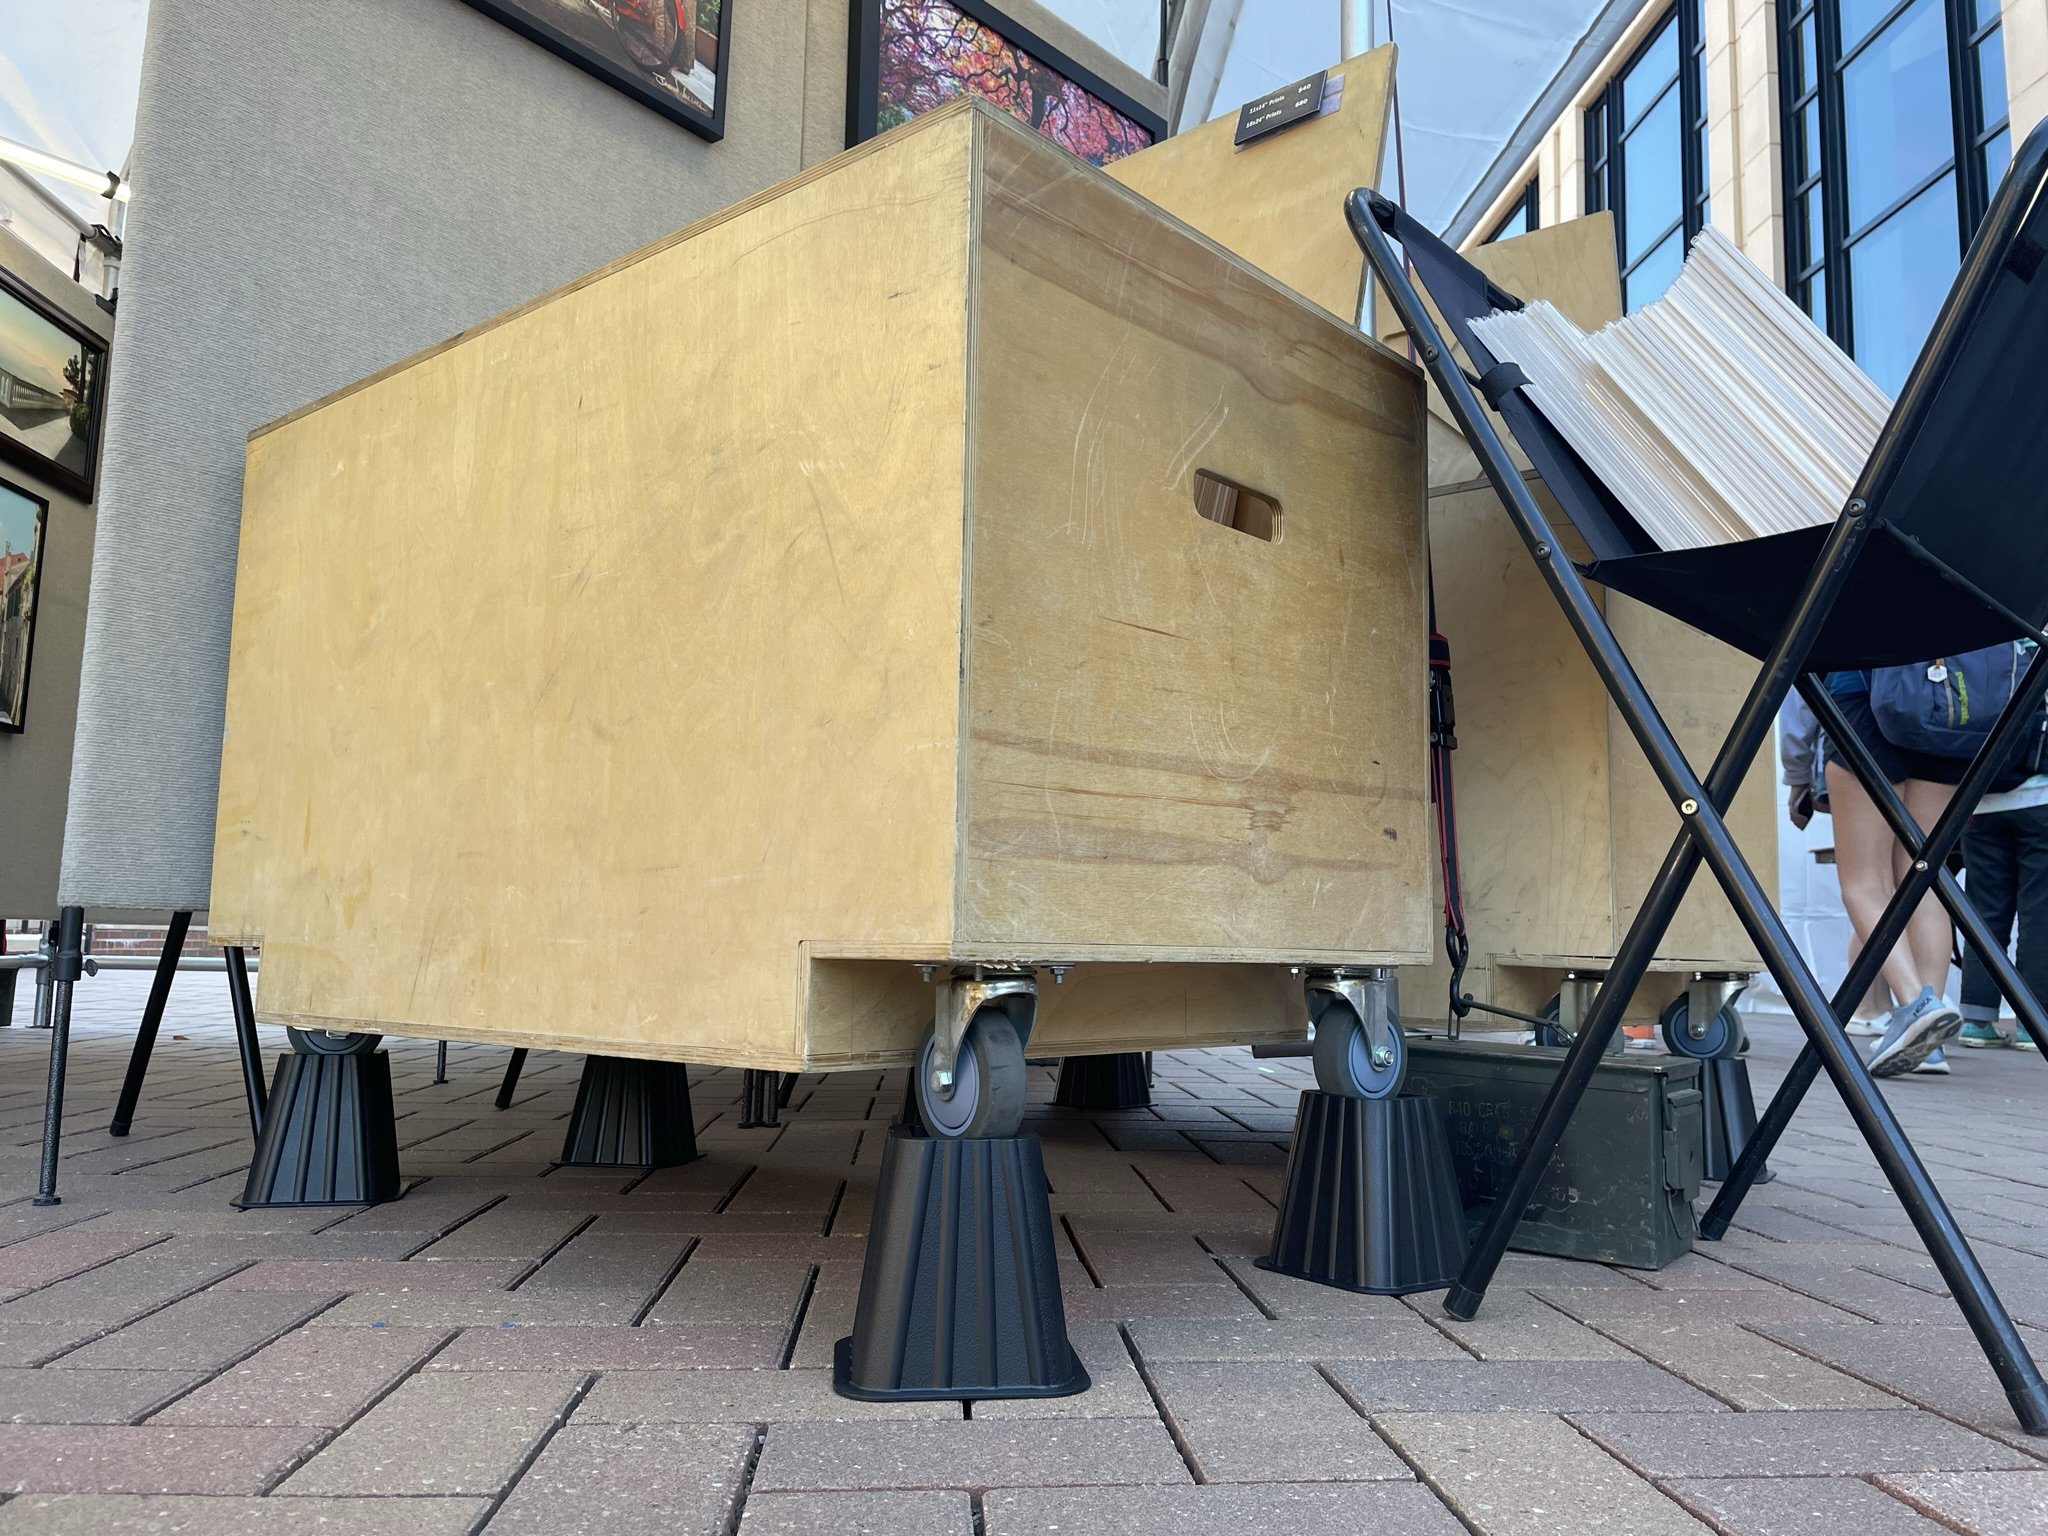
Personal note: I drive a minivan and made two rolling crates to carry all my framed pieces. I also use several Uline cardboard boxes to carry my prints (both the matted and unmatted ones). The framed pieces are wrapped in Reflectix (silver bubble insulation) — make giant bags with it! The crates have a false floor, which turns them into print bins! This keeps the crates useful instead of taking up space. Everything should serve a purpose, and if it serves two purposes, even better!
My latest addition — roof cargo box! The cargo box carries the wonkily-shaped things: folding print bins, director’s chair, and sometimes the ceiling fan.

IV. The Show
Where do you find shows?
👉 Zapplication 👈
Also known as “Zapp”, the site indexes a zillion shows all over the country, and allows artists and shows to find each other. The site is free to use.
👉Art Fair Source Book👈
AFSB is a paid resource which indexes and provides in-depth details on over 1,300 art shows across the country. It offers self-reported data from artists and events about things like demographics, historical sales data, economic data. Most artists I know who use it highly recommend it. This service has an annual cost.
More resources:
How do you apply to a show?
Once you’ve found a show to apply to, the application process generally goes in two steps.
Step one: Submit an application containing all of this, and pay the application fee.
Contact info: name, or business name, address, phone number.
3-5 photos of your work
A photo of your booth
Artist statement — between 100 characters and 500 words, depending on what the show asks for.
Application fee — the cost of having your work judged for approval
Application fees (if the show has one) generally run between $15 and $40. Some of the more competitive national shows are even higher.
The application fee can be a point of financial consternation. If a show doesn’t select you, then you are out the cost of the application fee. If you are in the (albeit unlikely) situation of having applied to ten shows with a booth fee of $30 and don’t get into any of them, then you are out $300.
When you are accepted to a show:
Step two: Make a selection about your booth size, and any other special requests, and pay the booth fee.
This is when you select the size and location of your booth spot. Events generally offer several options:
10x10 booth (most common)
10x20 booth (for those with double tents)
Corner booth (popular, and get reserved quickly)
10x20 corner booth (uncommon, and most expensive)
Booth fees are up to the show. They vary depending on size, competitiveness, attendance, age and location of the event. If it’s a local show with an attendance of 15,000, and it’s been around for 3-5 years, it might have a booth fee of $150 to $200. If a show has established itself as a state or national event, attracts over 500,000 people, and attracts artists from across the country, the booth fee may be $400 and above.
Some events let you choose an exact booth location. This can be helpful on many fronts: if you’re in a familiar spot year after year, your customers may get accustomed to where to find you. You can orient your booth so visitors can see you from a distance, and this could help you stand out.
Some events assign booth spots according to a predetermined goal: to spread out similar artists so visitors see a variety.
If this is your very first show, I highly recommend doing a ‘dry run’ with your complete booth. Spend a day to set up your booth at home. Get familiar with the process of setting up you booth so it can go smoothly when the show comes.
Time to apply
Apply 3-6 months before a show. And after you apply, you won’t hear from them for at least a month. Once you hear from them, that’s when it gets real. You got in!
Why apply to one show over another?
Multiple shows on the same weekend
All across the country, there are shows every weekend. In winter months, you can find a lot of shows in Florida. In the summer, some of the most popular shows are in Michigan, Colorado and Utah. If there are multiple shows on a given weekend, do some market homework in advance and try to narrow down if one is better for you and your work.
Juried vs. non-juried shows
Juried shows are generally curated to the taste of what the character of the show wants to be. As you grow and master your medium, and the look of your display, you are likely to get into more juried shows.
If you find an event that isn’t juried, it might not have an application fee, and it may ask you to pay for the booth fee up front.
Opinion 1 about non-juried shows: The fact that a show is non-juried could mean that the art festival is a free-for all. (Remember the part about “art festival or craft show?!” A non-juried show is another type of show in that list — because it’s none of the above. It’s first come first serve. It’s my experience that customers at those shows could be looking for cheap stuff (whether it’s craft or art). They might not looking to buy your biggest piece.
Opinion 2 about non-juried shows: Some of the best fun I’ve had at art festivals happened at non-juried shows. The (sadly gone) Blue Dome Arts Festival in downtown Tulsa, Oklahoma was a prime example. It felt like a passion project for the Blue Dome Arts District, always had felt positive and energetic, and everyone was excited to be there. It was a satellite show to Tulsa Mayfest, which is a juried show a few blocks away on the same weekend. There was appreciation between the two events, no drama, and some of the crowd believed the two shows was one big event anyway. (Today, the soul of Blue Dome is represented at Mayfest in the “Local Artist” section. It’s not the same, but it does feel good to have that connection between the events.)
Subject matter might not sell at some shows.
As a landscape photographer, I feel restricted to offer certain images to people in certain places. For instance, I have a lot of photos of my home state of Oklahoma. I really don’t think it would be a good use of my time to try to offer them to people in Michigan.
Attendance of the show
Most shows announce their estimated number of visitors. This is a helpful number to know because generally the more well-attended a show is, the greater the potential of making more sales. Also, the more well-attended shows are juried and more competitive to enter.
Consider a formula: If X number of people attend a show, what percentage of X steps inside your booth to browse? Those visitors are in a set we call Y. What percentage of Y buys a piece from you? The total number of customers are in a set we can call Z. Suppose one show has X=15,000, and another has X=500,000, what could Z be at each show? Art Fair Sourcebook (mentioned above) can help you estimate such a calculation with actual numbers from each show.
Set Up Day
Let’s start the day before the show. Build the booth — your personal gallery! Give yourself time to make it nice!
Set up the tent itself
Add the display panels
If you feel comfortable hanging artwork the day before, do it too
The show should provide a bunch of instructions ahead of time on when to arrive, where to check-in, how to enter the show safely to unload.
The show may even offer volunteers who can help you. Get to know them!
Note of courtesy: How long do you need your vehicle to be inside the bounds of the show as you unload? If you can remove everything, re-park somewhere else, then come back and build the booth, this will free up space so other artists can drive through. I fully understand that no everybody can do this.
When you’re done for the night, zip up the booth and get ready for tomorrow!
Same-day shows
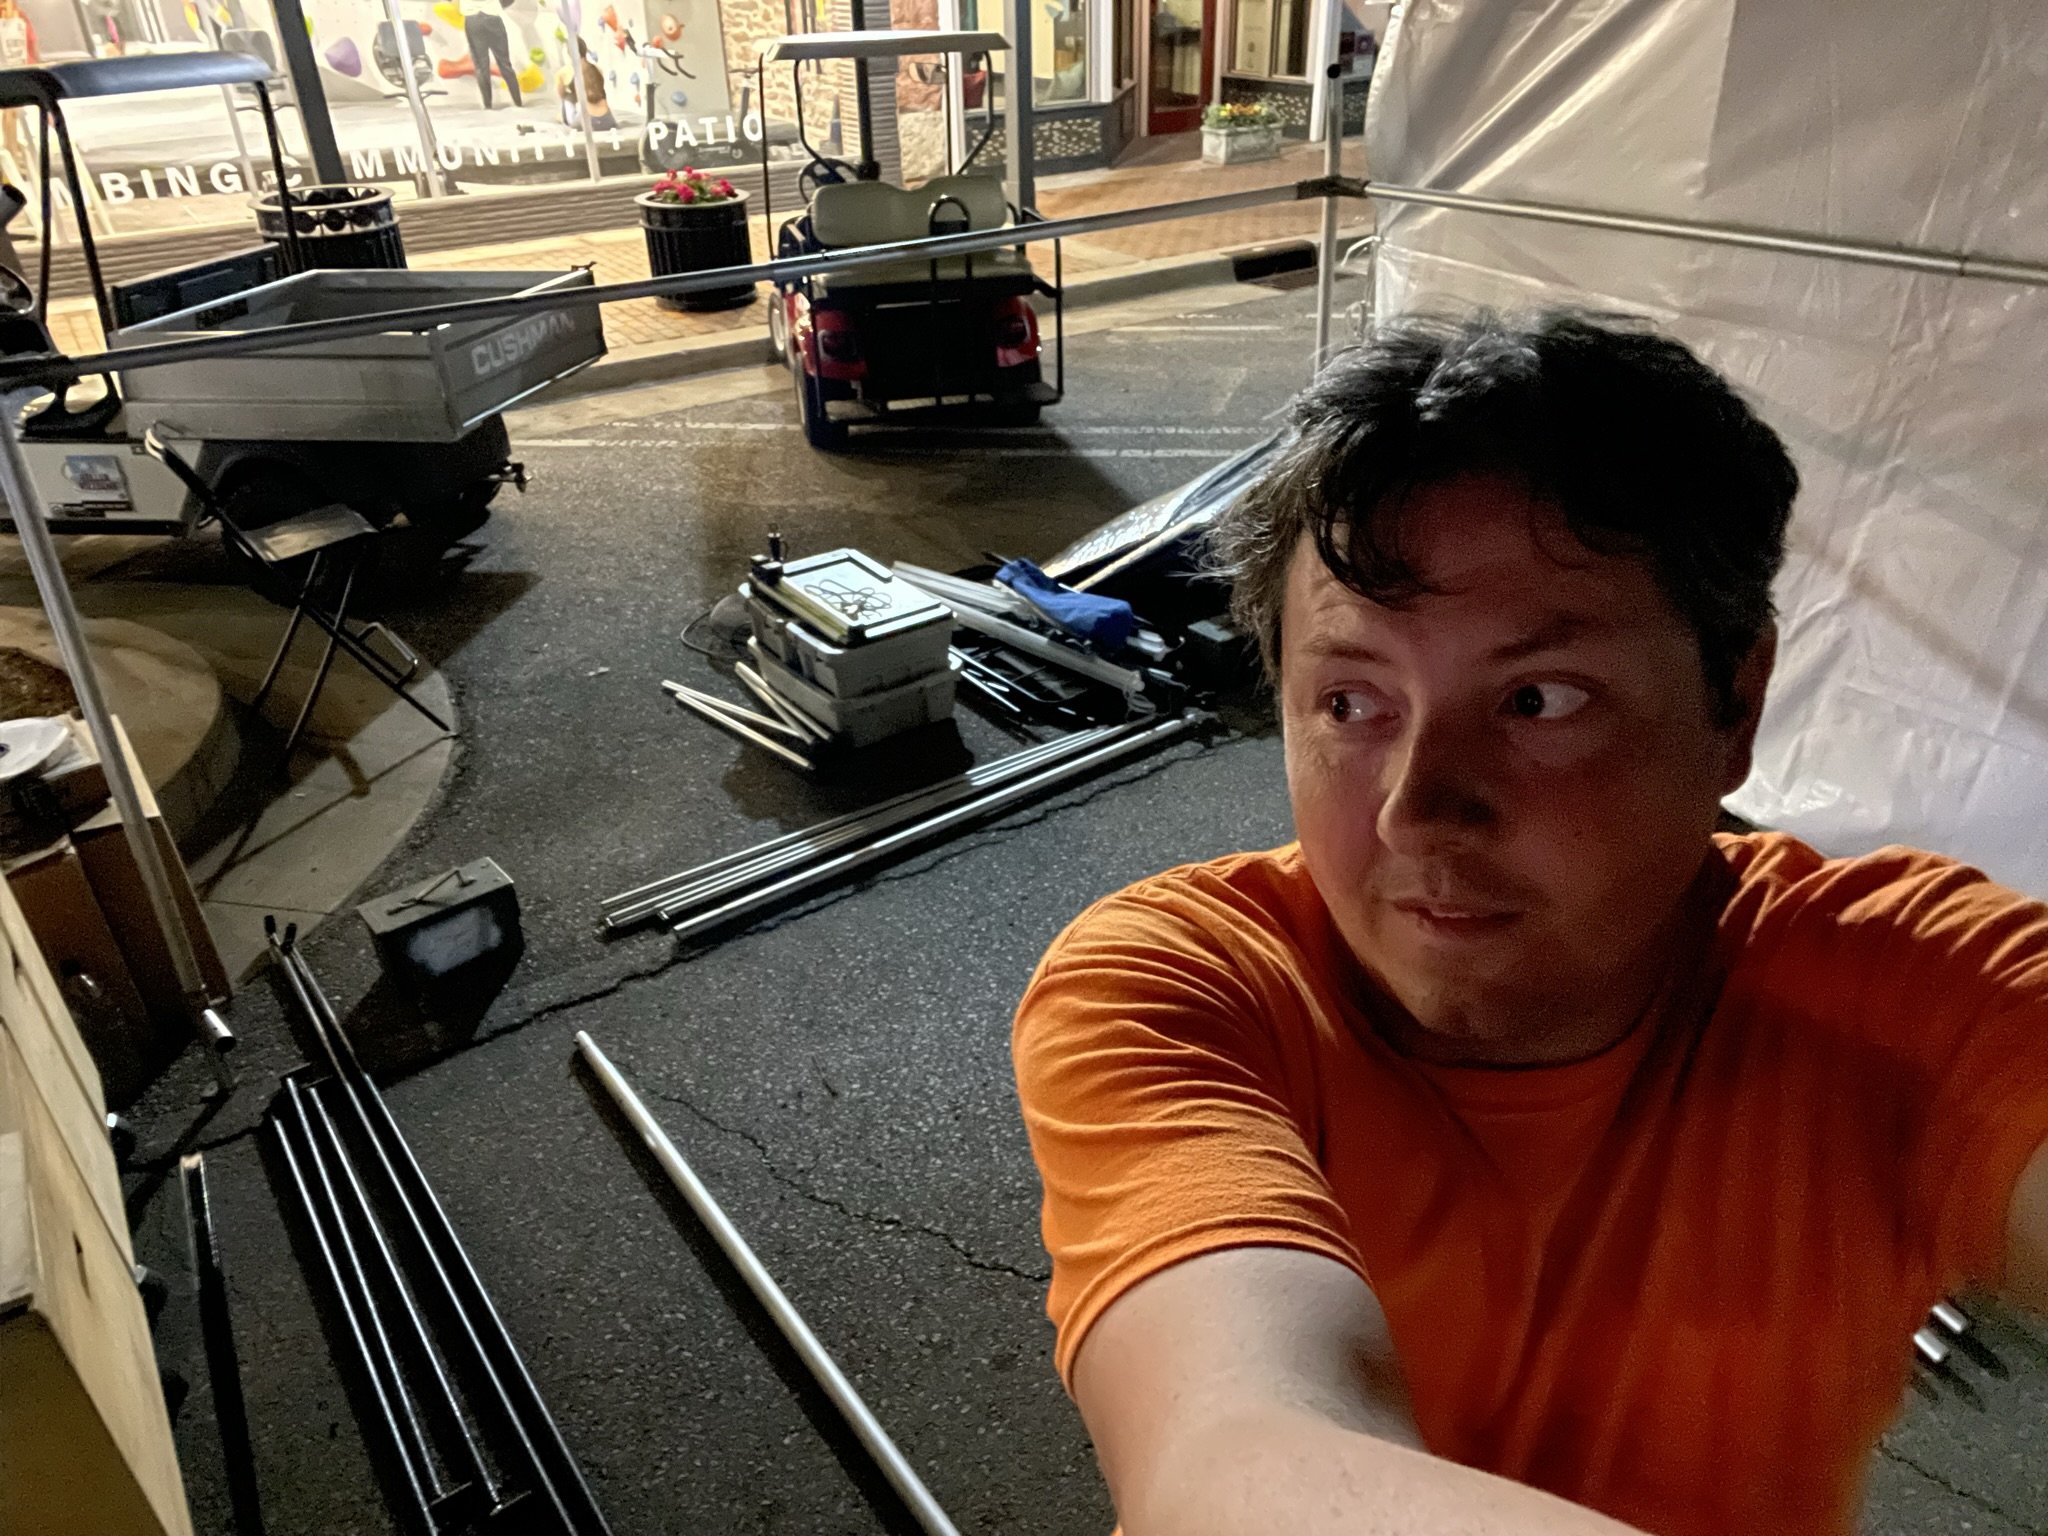
Some shows have set-up on the first day of the show. These can pose a challenge if the booth takes several hours to build. (If, say, you’re setting up by yourself, or it’s an involved process.) Find time to take a shower between setting up the booth and when the show starts.
Trust me, you don’t want to look (and smell) like you just got done building an art booth.
One-day shows
These are the most challenging because you have to set up the booth, do the show, then take it down — all in ONE DAY. I’m not going to sugar coat it — It can be mentally and physically exhausting, especially if you have an involved display with lots of parts. However, the customers know that artists will be there for only one day, so they are likely under more pressure to buy! (I’m looking at you, Utica Square in downtown Tulsa!)
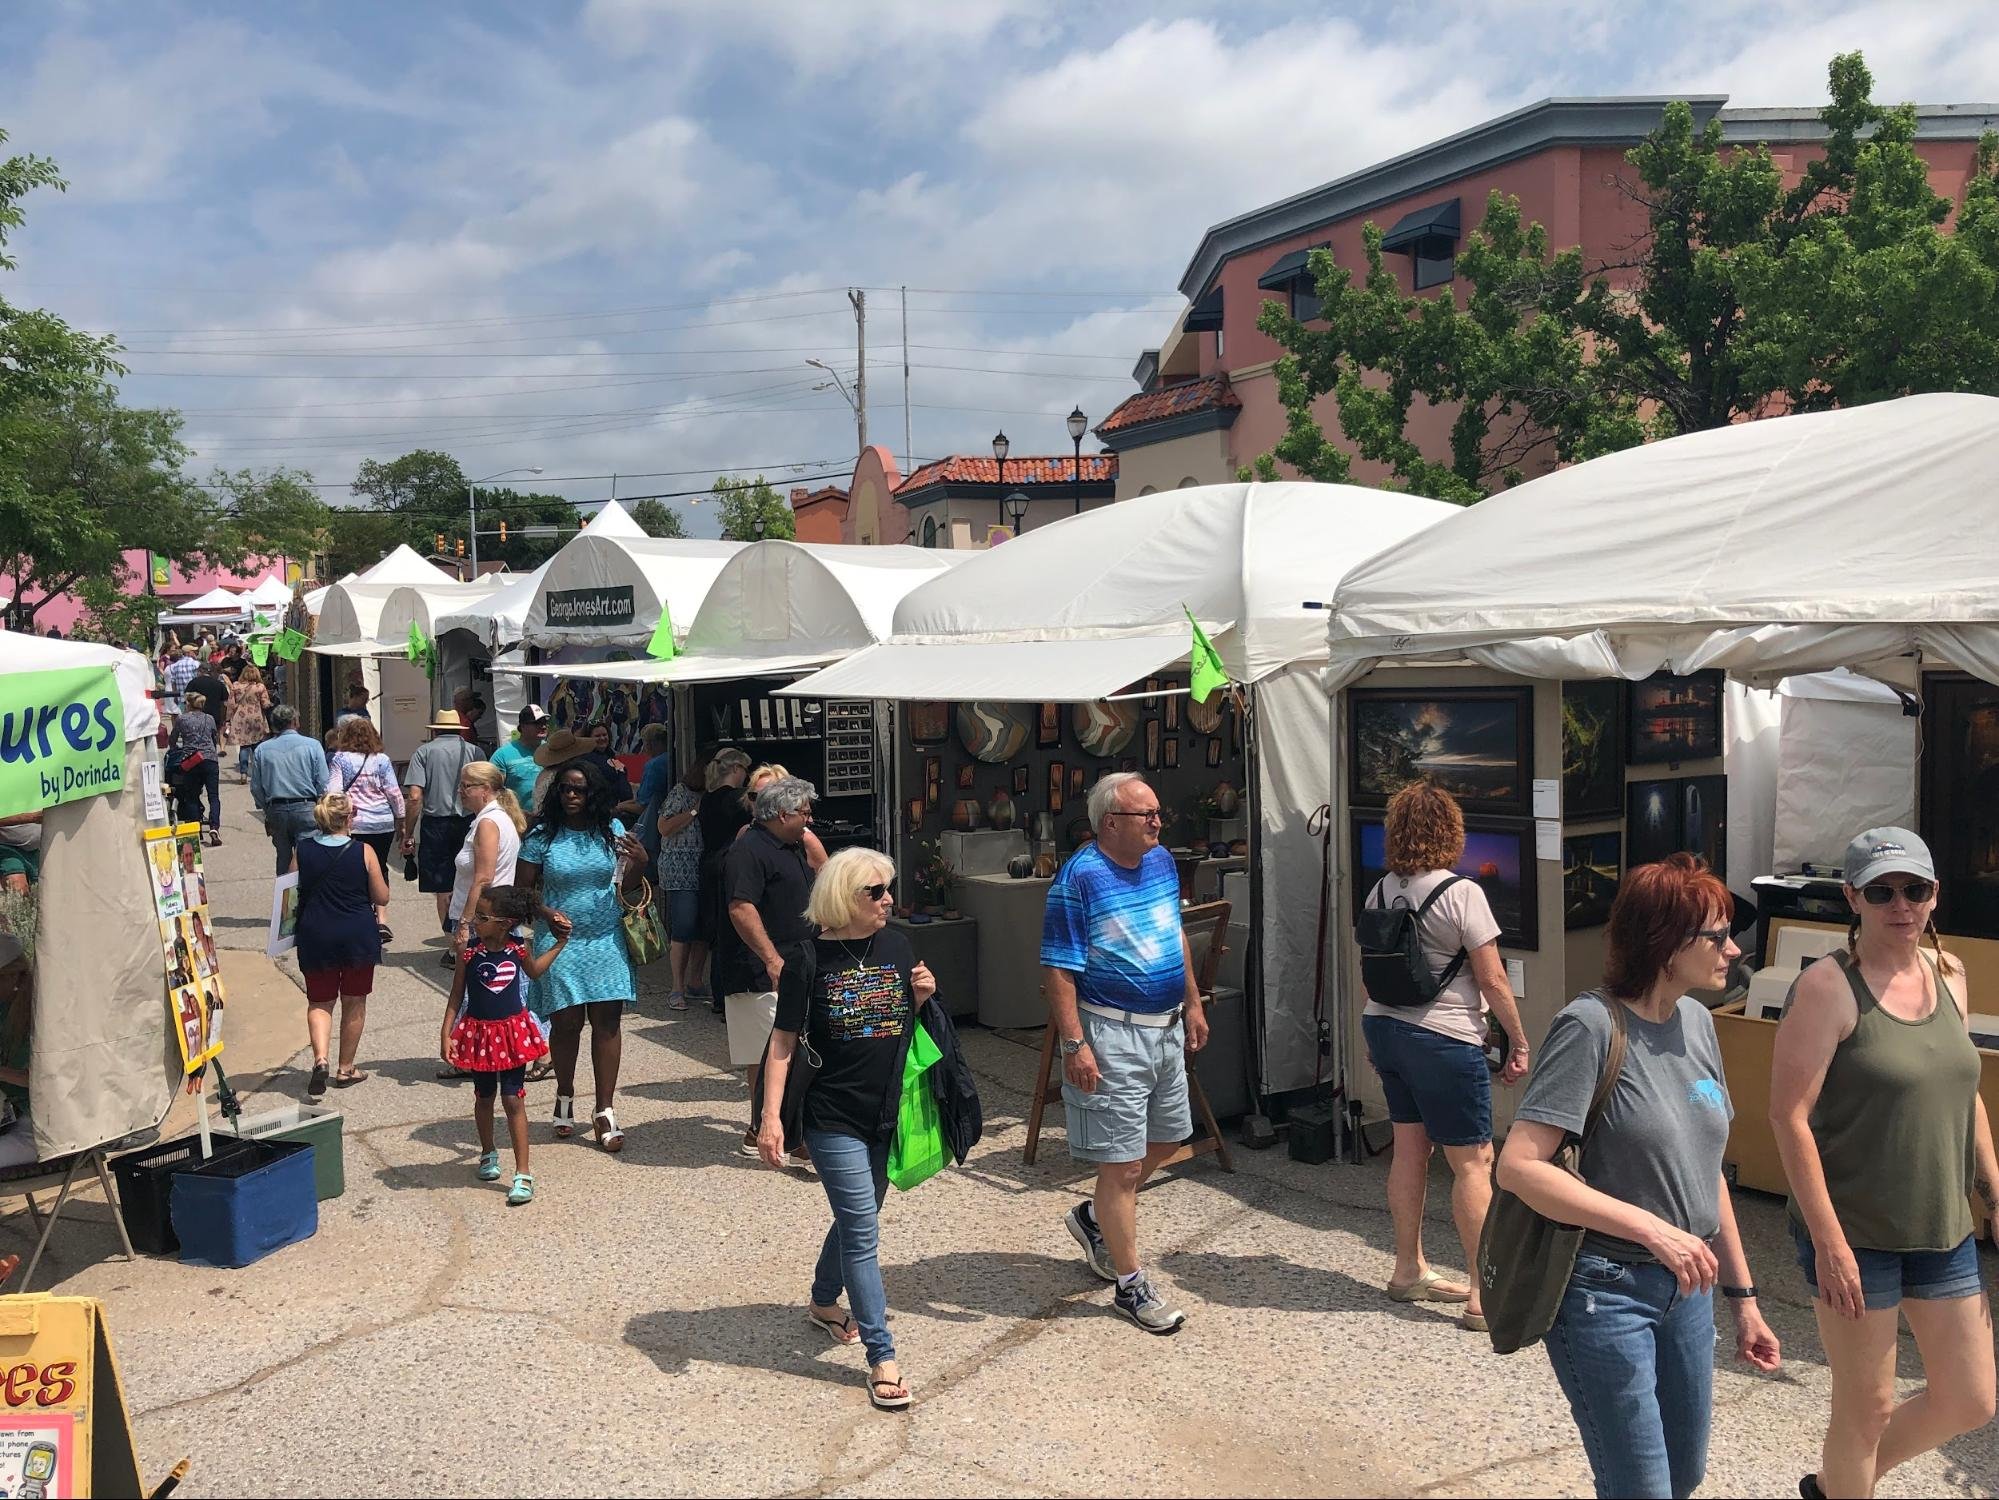
The Show
This is when you arrive early and unzip the booth for the world to see!
Arrive early enough to make sure the booth is ready.
Engage with your visitors! Offer a welcome to people upon entering. This is your work, you’re proud of it, and they want to learn more!
Be attentive when people are browsing your work. Offer a quick pitch or little story and be ready for questions. Also be ready for wit. (There’s some funny people out there!)
Respect the opinions of your visitors, as most are likely seeing your work for the first time. Avoid coming on too strong. Don’t be overly concerned with making a sale.
Stay engaged, but don’t overwork yourself. Understand that you are doing this for a good portion of the day. Take advantage of when the festival sends volunteers by to watch your booth. They’ll let you take a break!
Avoid sitting in the back of your booth and pecking away at your phone. I’m sometimes guilty of this, especially in the mid-afternoon when the crowd is thin and the day is hot. (There’s a thin line between looking disinterested, and simply taking a mental break.)
Be comfortable: Bring a cooler, pack a lunch. Yes, the food court is tempting, especially with wave after wave of visitors walking by with tasty creations from the local food trucks, but the price will add up.
Share your info! Share business cards, have a poster on the wall with your website and QR code to social media, manage and maintain a mailing list.
Don’t worry about critics and things you can’t change. Wear sunscreen. (...it’s a classic song)
When someone wants to buy something
Take mobile payments!
Square - for physical cards: chip and tap.
More options: Venmo / Cash App / PayPal
Some people will pay with cash, so have the ability to make change. This can get complicated if you have to collect sales tax on top of the transaction.
Have retail bags or packaging so the customer can carry their new work of art home safely. Use plastic wrap for moving as a way to wrap up framed pieces.
Pay attention to which pieces sell, and which don’t. Be ready to adjust for the next event. (Be careful not to chase sales that haven’t happened.)

Packing Up
It’s time to turn the street back into a pumpkin.
Everything goes back where it all came from: back in the boxes, back in the van, and generally in reverse order from when you took it out. This is when it helps to have a system. What do you pack up first, where does it go? What do you pack up second, where does it go?
One of the biggest things that can add time — parking. Can you park your vehicle next to your booth? If not, you’ll have to dolly out.

It’ll fit back in there. It has to!
Note of courtesy: If you can, don’t give in to the temptation to go get your van the second the show ends. When you start dismantling your booth, do you actually need your vehicle at that moment? I mention this because if everyone does this, the location gets so crowded that vehicles trap people in.
I don’t know how many times I’ve seen shows end, and in no time at all, there is no space for me to drive in. I have established a system for my booth so I can pack the art in their boxes, and completely dismantle the display and tent before I need my van.
Overall, have fun!
Consider the importance and value of art, and own your place as a creator in that space. Make friends! Get to know fellow artists! You’re all in this together! You may find yourself with friends you would have never otherwise known, and that’s invaluable.
Find your takeaway — What worked? What didn’t? What are you enjoying the most? What might you change to improve the experience? Are you ready to do another event? See where it takes you!
I look forward to hearing what you think of this, how it may have helped you, and if you think it needs anything.
Take care, and create!
More resources:
Subscribe to Sunshine Artist Magazine.
Join Facebook groups: